
N1MM Logger+ Digital Interface for Gritty
- Download and Install N1MM Logger+
- Set up N1MM Logger+ Configuration
- Set up Digital Interface Window for MMTTY
- Set up 2Tone in a Receive-Only Window
- Set up Gritty in a Receive-Only Window
- Set up RTTY messages page 1 > F1 through F12
N1MM Logger+ > Setting up Gritty in a Receive-only Digital Interface window
Gritty is a free RTTY decoding program written by Alex Shovkoplyas, VE3NEA. It is based on the technology developed for the RTTY Skimmer Server project. Although Gritty is designed to decode RTTY signals in 3 kHz of bandwidth, it also works well in narrower bandwidths such as those used in RTTY contesting. For that reason, it has become a popular “receive only” decoder since being incorporated into N1MM Logger+ in 2015. For more information on Gritty, visit the Gritty webpage at http://www.dxatlas.com/Gritty/.
These instructions will walk you through downloading and installing Gritty as well as interfacing Gritty with N1MM Logger+ to be used as a receive-only decoder. For the purpose of this tutorial, it is assumed that MMTTY is configured at DI-1, 2Tone is configured as DI1 RX Window 1 and Gritty will be configured as DI1 RX Window 2.
1. Download Gritty from Alex’s Download page at http://www.dxatlas.com/Download.asp. Look for the Gritty download link as shown in Figure 5-1.

Figure 5-1
Click the GRITTY link to download the file Gritty.zip to your hard drive.
[wpanchor id=”2″]2. Find Gritty.zip on your hard drive and extract the file Setup.exe. Run Setup.exe and Gritty will be installed on your PC at the default location C:\Program Files (x86)\Afreet\GRITTY\. (It is recommended you install Gritty in the default location because N1MM will look for it there). The actual executable program file is called Gritty.exe as shown in Figure 5-2.

Figure 5-2
3. Open N1MM Logger+. If it is not already opened, open the Digital Interface (DI-1) from the Window menu. If you have been following this Quickstart Guide and have already set up 2Tone in a receive-only window (DI1 RX Window 1), then it should be present in the Digital Interface as shown in Figure 5-3. The window with 11 in the left hand green bar is the 2Tone “DI1 RX Window 1” window, thus tagged 11 (Figure 5-3). If you have MMTTY set up as the main Digital Interface 1 (DI-1) and 2Tone set up as the Digital Interface 1 Receive Window 1 (DI1 RX Window 1), then Gritty will be configured as Digital Interface 1 Receive Window 2 (DI1 RX Window 2).
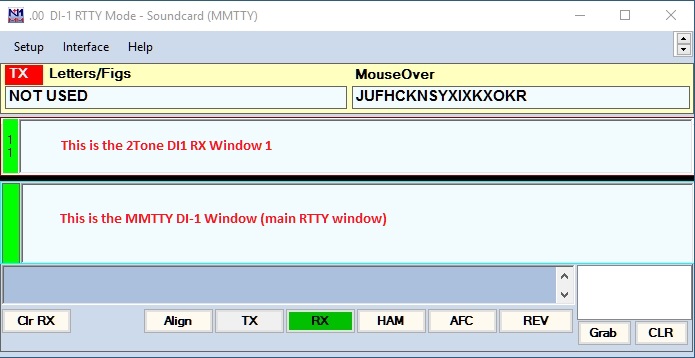
Figure 5-3
4. If you installed 2Tone at DI1 RX Window 1 and it is attached to DI-1, unattach it so that DI-1 has only one decoder showing in the DI window (Figure 5-5). (Do not close the 2Tone windows, just unattach them.) To unattach receive-only windows from the main DI window, go to the Setup menu, then to Add. RX Windows and uncheck Enable Attached RX Windows as shown in Figure 5-4. (NOTE: You must unattach receive-only windows in order to configure them. When the receive only windows are attached to the main DI window, the Setup menu is not visible for those receive windows and therefore is unavailable. Once you unattach them from the main DI window, the Setup menu then becomes available. Once you have configured your receive-only windows, you can them reattach them to the main DI window if you wish. Attaching receive-only windows reduces the amount of space taken up on your monitor.)
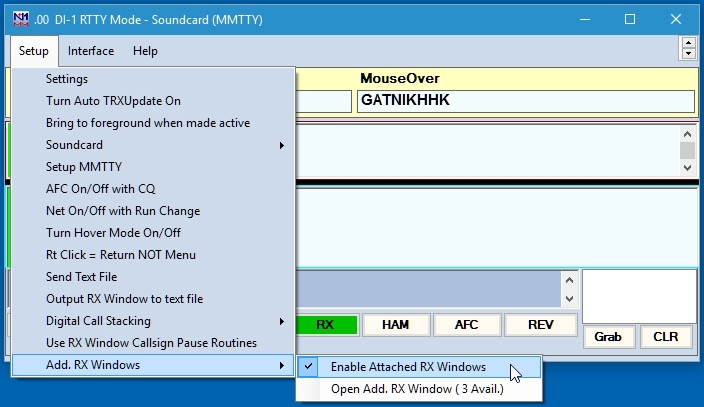
Figure 5-4
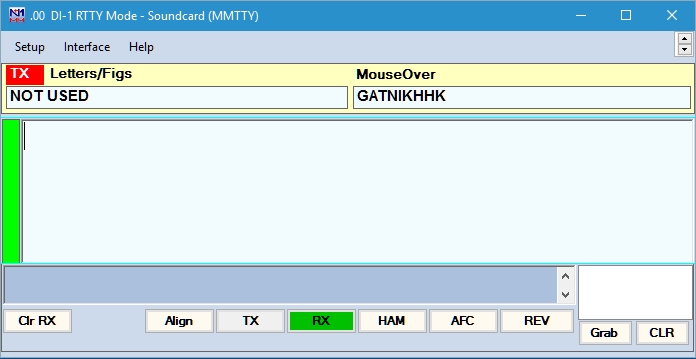
Figure 5-5
5. To open a receive-only window for Gritty, go to the Setup menu in the main DI window, then to Add. RX Windows and click on Open Add. RX Window (3 Avail.) as shown in Figure 5-6 below.
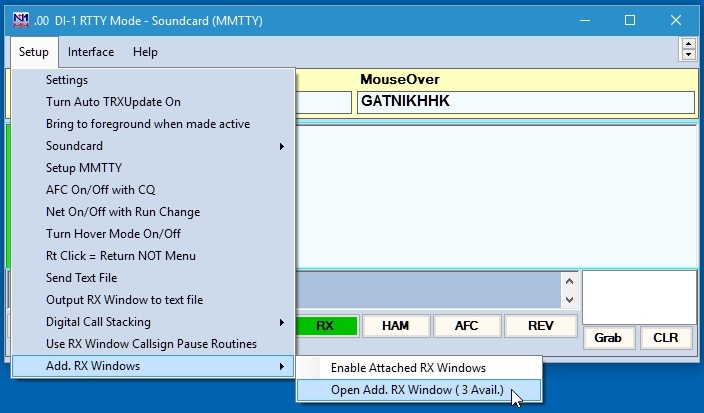
Figure 5-6
6. When you select to open the additional RX Window, a Setup screen should open as shown in Figure 5-7 (only the top half of the window is shown here). In the Window Type pull-down menu, select GRITTY.
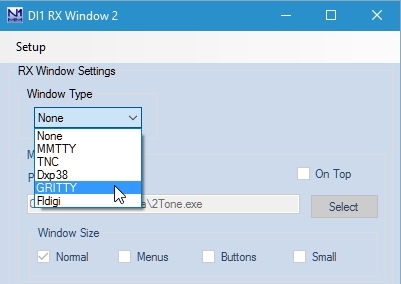
Figure 5-7
7. When you choose GRITTY from the Window Type pull-down menu, you will notice at the bottom of the DI1 RX Window 2 setup screen that the path becomes populated to the location of Gritty.exe if you installed it in the default location as shown in Step 2. If you did not install it in the default location, use the Select button to navigate to the correct path to Gritty.exe. When finished, hit Save (Figure 5-8).
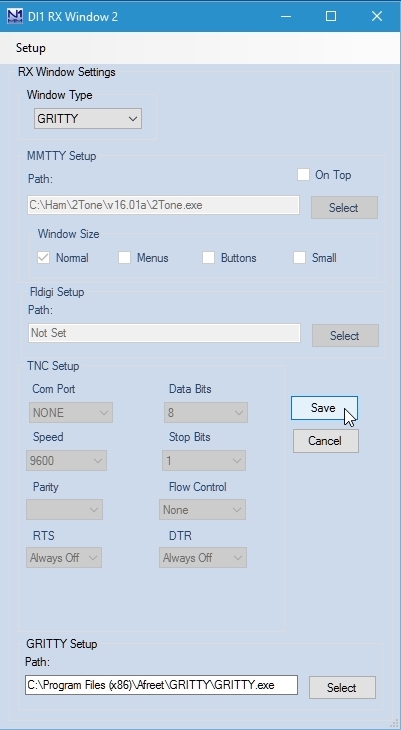
Figure 5-8
8. The Gritty engine and the DI1 RX Window 2 windows will open as well as another windows telling you that the windows need to be closed in order for the changes to take effect. Click OK. The Gritty engine and DI1 RX Window 2 will close, then reopen.
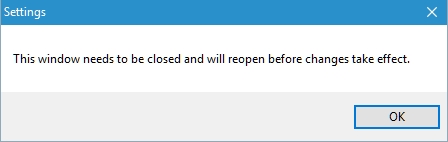
Figure 5-9
9. Resize and move the Gritty Engine and DI RX Window 2 so they do not overlap each other. (NOTE: Do not be alarmed at the size of the Gritty Engine window. When everything is configured, this window will be minimized because you will not need to see it during normal operations. Therefore it will not take up space on the monitor.)
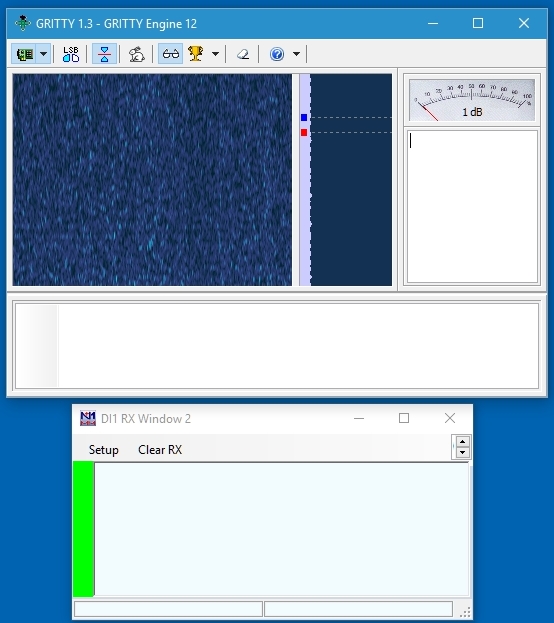
Figure 5-10
10. The menu buttons across the top of the Gritty Engine are important. They are used to do things such as choose which sound card and which channel to use. One menu button is used to toggle AFC on and off. Instead of explaining each menu, I’m recommending you read the Help file to learn more about the menu options (see Figure 5-11).
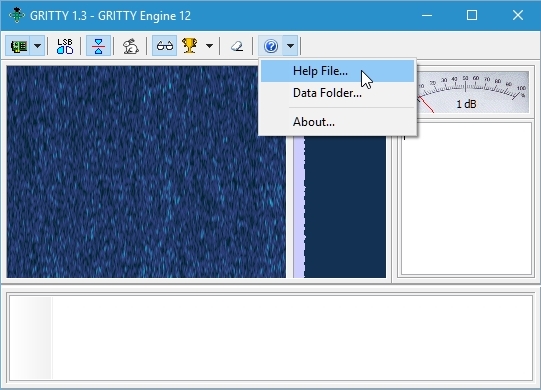
Figure 5-11
11. Gritty works straight out of the box unless you run FSK with low tones or a tone pair other than 2125/2295 Hz. The only way to change the tone pair in Gritty is to edit the INI file. Here’s where it gets tricky. If you run Gritty as a stand-alone program and not within N1MM Logger+, then the INI file is called Gritty.ini. To find it, search your computer for Gritty.ini. However, when Gritty is used with N1MM Logger+, there could be several instances of Gritty (remember you can have up to 4 RX DI windows). Therefore whenever you create a DI RX Window, a new INI file gets created for that particular instance of Gritty.
In our example, we activated Gritty as the second receive-only window, or DI1 RX Window 2. Therefore the INI file for that particular instance of Gritty is named Config12.ini (DI1 RX Window 2) as shown highlighted in Figure 5-12. I purposely created a Gritty instance in DI1 RX Window 1 to show you that you could have multiple INI files depending on where you activate your receive-only Gritty windows. Notice the path to the INI files. It’s located in C:\Users\Username\AppData\Roaming\Afreet\Products\GRITTY.
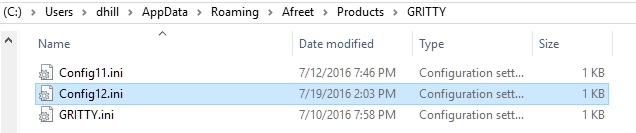
Figure 5-12
12. To edit the Configuration INI file for your particular instance of Gritty, close Gritty if it is opened, then open the INI file in Notepad or some other text editor. If you use low tone frequencies of 1275 /1445 Hz, you will need to edit the INI file and change the entry DefaultHighTones=2295 to DefaultHighTones=1445. Then save the file. (NOTE: If you do not use low tones, there is probably no reason to edit the configuration INI files so you may skip this step and continue to step 13).
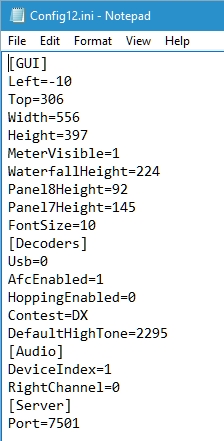
Figure 5-13
[wpanchor id=”13″]13. After you have Gritty configured, it’s time to attach all the DI windows so it makes a neater package. You could leave them unattached but it’s more efficient to attach them and makes for a more organized desktop. With the 2Tone and Gritty RX windows enabled, go to Settings menu in the main DI window (DI-1), select Add. RX Windows and click on Enable Attached RX Windows. The result is shown in Figure 5-14. The top window (11) is 2Tone, the middle window (12) is Gritty and the bottom window in the main window with MMTTY.
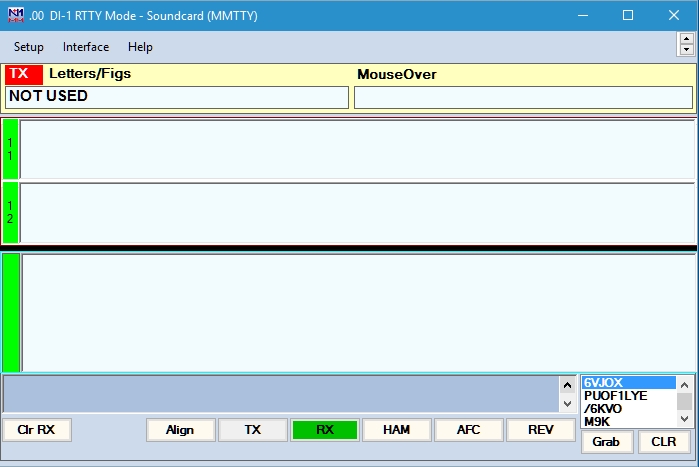
Figure 5-14
Now that you have all your RTTY windows configured, let’s create some messages to send during the contest. Continue on to Setup RTTY Messages.