DigiRite – Build Instructions
THESE INSTRUCTIONS ARE FOR DIGIRITE 2.2.2.11 AND EARLIER AND HERE FOR REFERENCE ONLY. THESE INSTRUCTIONS WILL NOT WORK FOR LATER VERSIONS STARTING WITH 2.6.0.6 (DECEMBER 2024).
The latest version of DigiRite is 2.2.2.11. Versions 2.2.2.6 and higher requires WriteLog version 12.52F or later. Because of the different versions available, the screenshots may not show as the latest version.
These instructions are specific to building beta versions of DigiRite. To stick with versions that are known to have been more widely tested, use the instructions at http://writelog.com/digirite-build.
As of this writing, the beta code for DigiRite is published in a git branch named VERSION-2.2.1-Beta which appears in the instructions below. The development convention is that new betas will be published in a similar way, and these instructions should continue to work for future betas, but you’ll need to know how they are published. Subscribe here to get emails about new beta updates: https://groups.io/g/digirite-developers
It is recommended you read this page in its entirety before starting.
1. If you have not done so already, before attempting to build this Beta, go to the DigiRite Build Requirements page and download all the necessary files and programs needed to build DigiRite. In addition, if needed, you can consult the DigiRite Build page on the WriteLog website at: https://writelog.com/digirite-build for additional information.
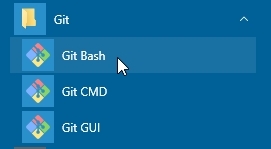
2. Open Git Bash from the Start Menu folder or desktop shortcut.
3. With Git Bash open, you will type in a series of commands. They are shown by the white arrows in the Git Bash screenshot below.
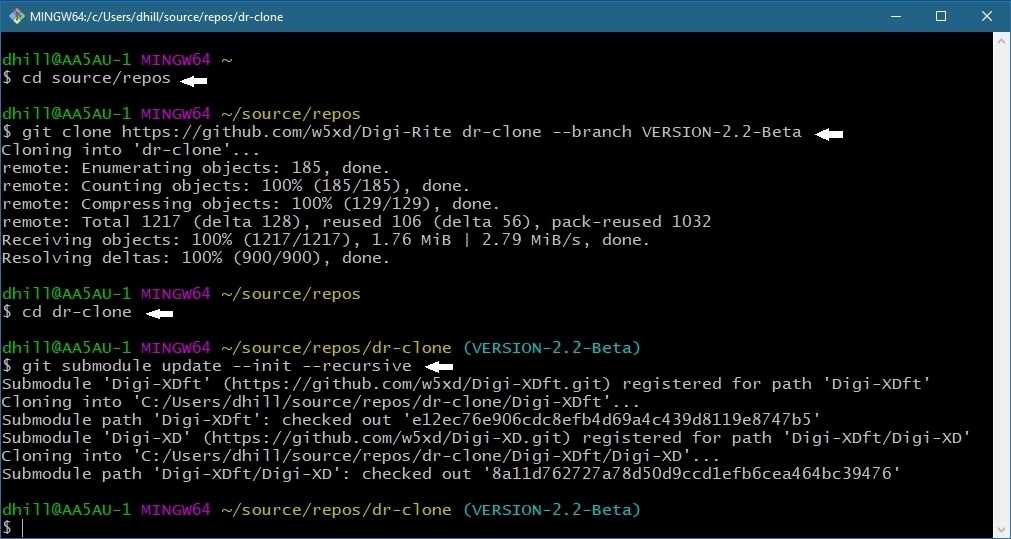
The first command line is:
![]()
Why? Because that is the default location for repositories in Visual Studio. Visual Studio will be used to build the beta. (The full path is C:\Users\%USERPROFILE%\source\repos.)
The next command is:
![]()
This command checks out the repository in the branch VERSION-2.2-Beta on the github site and places it in a NEW folder on your PC called dr-clone located in the sources\repos sub-directory. This will be your work area. You can name this new directory anything you wish by replacing dr-clone with another folder name. Also, if you are building a beta version other than 2.2.1, you would type in that version in this command line. (NOTE: If you substitute “master” instead of “VERSION-2.2-Beta” these instructions will also build the current release.)
The next command line is:
![]()
This command changes to the new directory that was created by the previous command. If you did not use “dr-clone” as the name of your new folder then change “dr-clone” to whatever you named it.
The final command line is:
![]()
Once you’ve entered the final command, you can then close Git Bash.
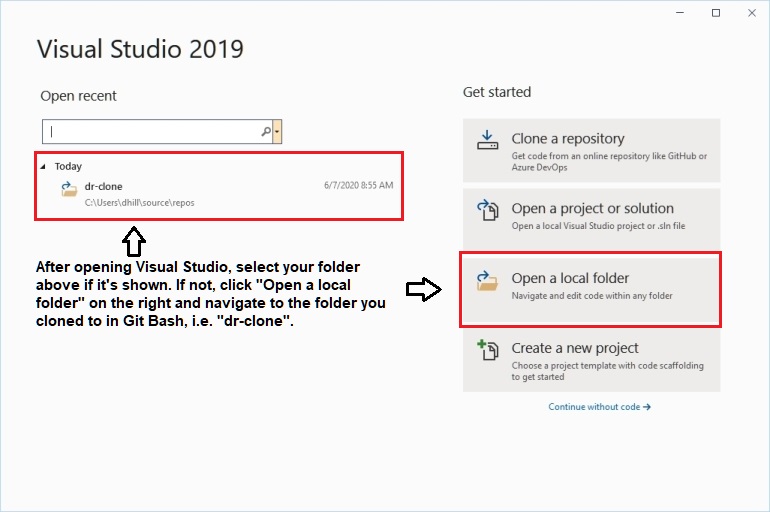
4. Now open Visual Studio. If your folder is showing on the left, then click to open it. If it is not shown, then click the “Open a local folder” option on the right and navigate to “dr-clone” (or whatever you named it) and open it. (NOTE: I always build from the same folder named “dr-clone”. Once I’ve built the MSI installer file, I copy it to another location on my hard drive. I then delete the folder “dr-clone” so that when I build the next beta, I use a clean directory and it’s always named “dr-clone”.)
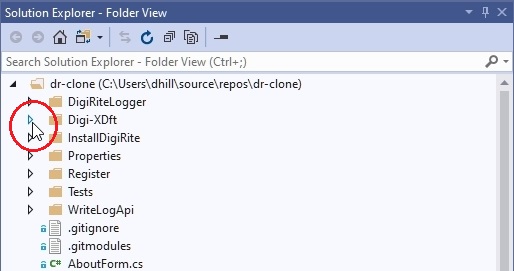
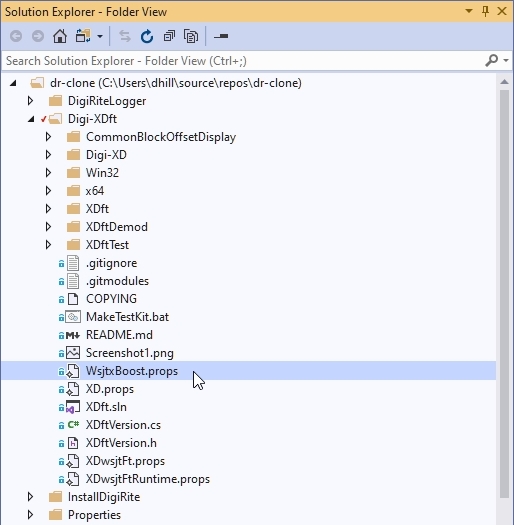
5. When Visual Studio opens, go to the Solution Explorer and click the arrow next to “Digi-XDft” to expand the tree.
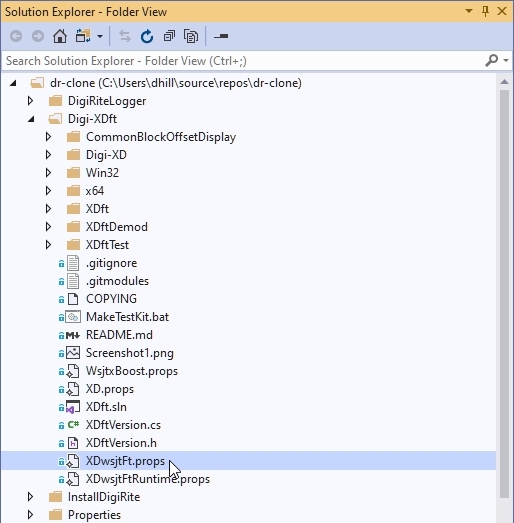
6. There are two .props files located in the Digi-XDft tree that need to be edited. One is XDwsjtFt.props and the other is WsjtxBoost.props. Find XDwsjtFt.props and click to open it.
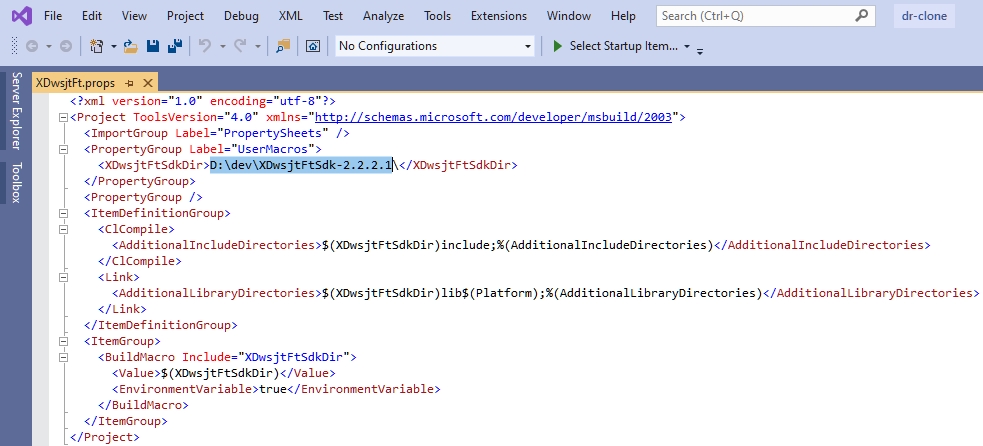
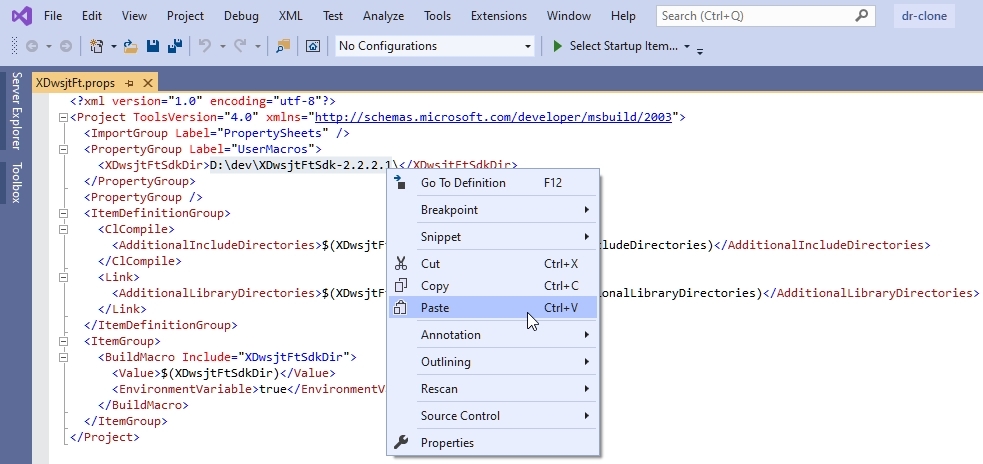
7. With the XDwsjtFt.props file open, the address D:\dev\XDwsjtFtSdk-2.2.1.3 needs to be changed to the address of XDwsjtFtSdk-2.2.1.3 on your PC. XDwsjtFtSdk-2.2.1.3 is the folder where the FORTRAN codes were downloaded to on your PC. I like to locate and highlight the entire path as shown here first then go to Step 8.
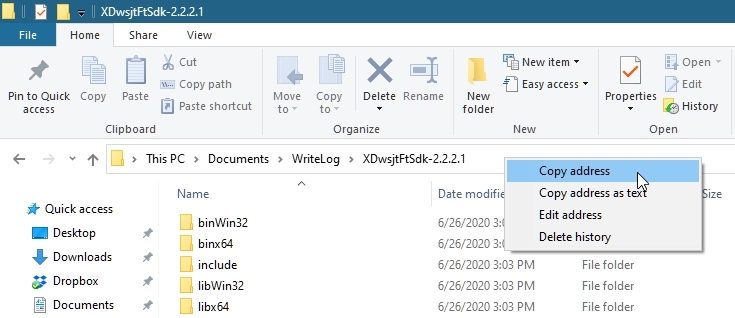
8. Open Windows File Explorer and navigate to the location of XDwsjtFtSdk-2.2.1.3 on your PC. Right-click in the address field and select “Copy address” or highlight the address, right-click and select “Copy”. Either method will work.
9. In the XDwsjtFt.props file, highlight the address D:\dev\XDwsjtFtSdk-2.2.1.3, then right-click and select “Paste”. Ensure a trailing backslash after the address.
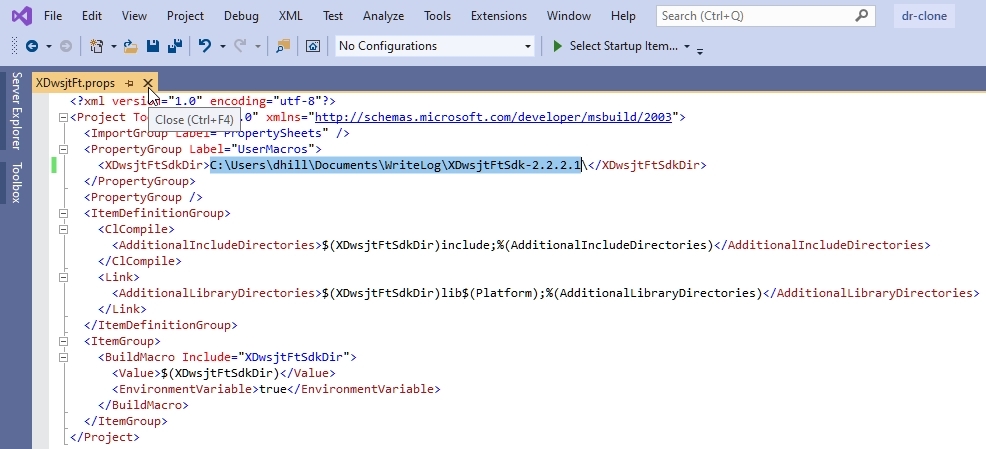
10. Double-check to make sure the address is correct. If it’s not correct, the build will fail. Now save the file using the diskette icon on the toolbar.
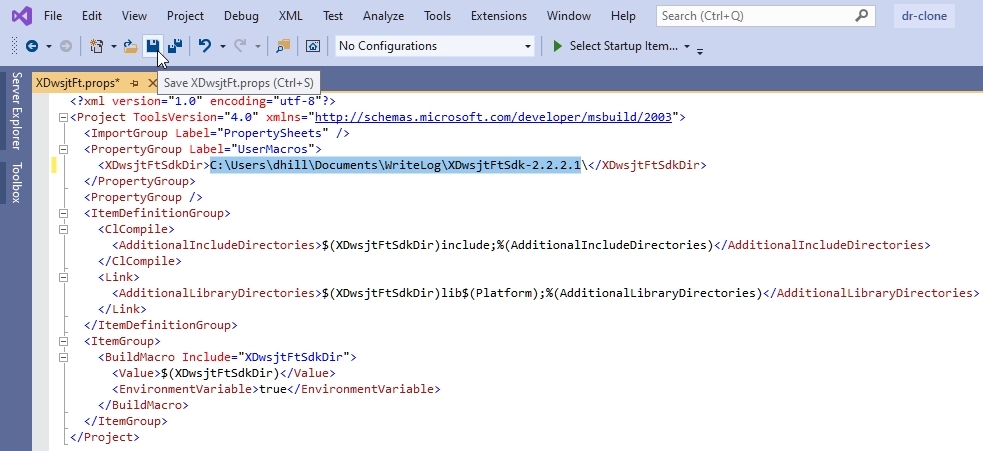
11. After the file is saved, click the X to close the file.
12. Now find the file WsjtxBoost.props in Solution Explorer and click to open it.
13. The address D:\boost\boost_1_67_0 needs to be changed to the address of the location of boost on your PC.
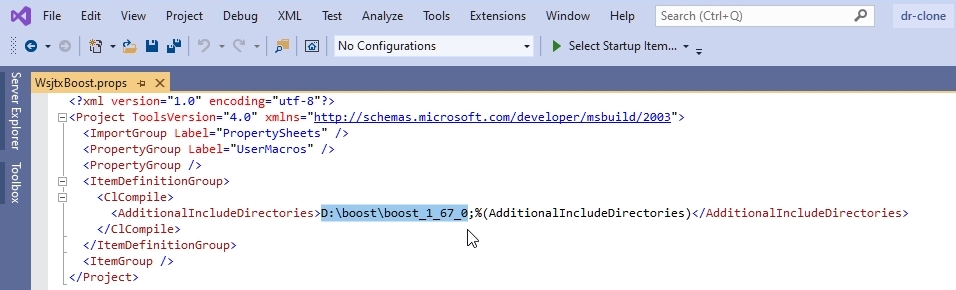
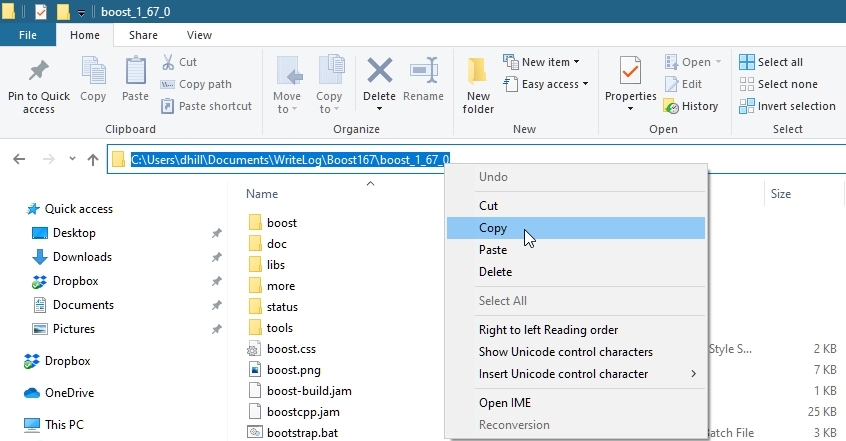
Open File Explorer and navigate to the location of Boost 1.67.0 and copy the address.
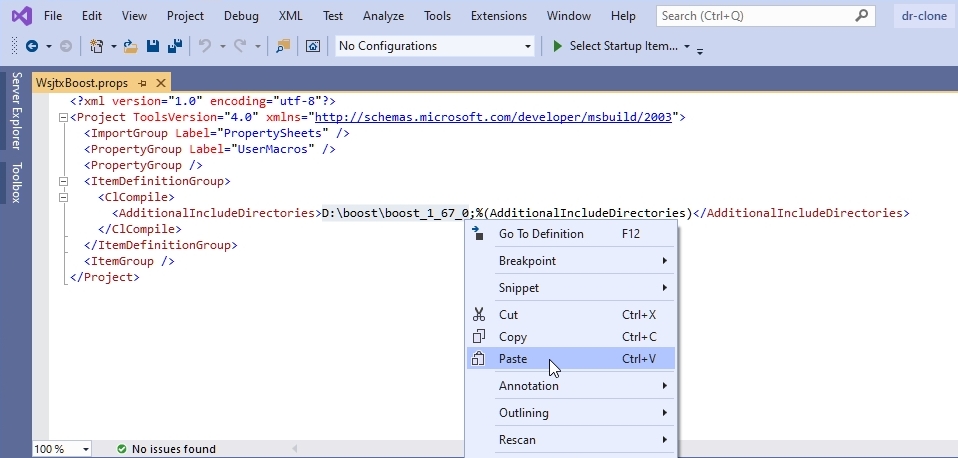
14. In the file WsjtxBoost.props, highlight the address D:\boost\boost_1_67_0, right-click and select “Paste”. Ensure a trailing semi-colon and no backslash after the address.
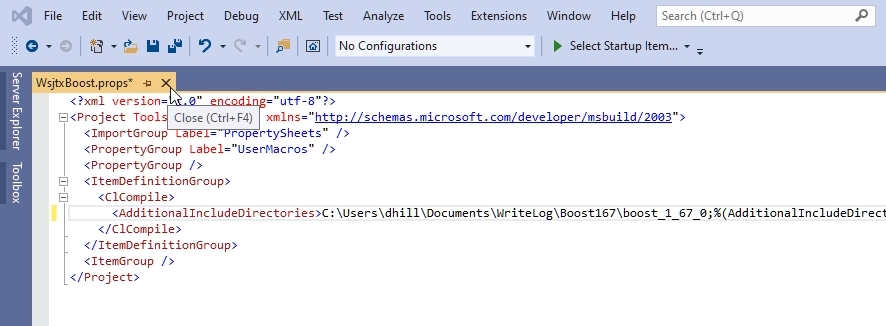
15. As you did in previous steps, Save the file using the diskette icon on the toolbar and close the file using the X.
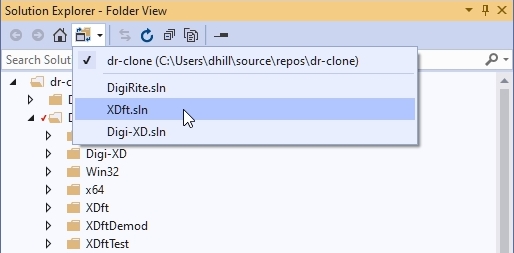
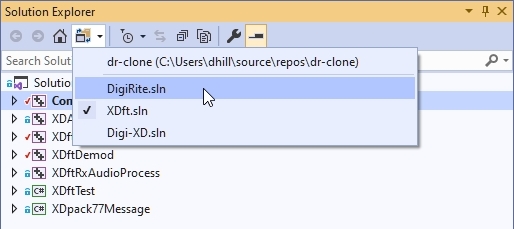
16. We are now ready build the beta. There are two solutions to build. Use the Switch Views pull-down menu in Solution Explorer and select the XDft.sln solution. It must be built first.
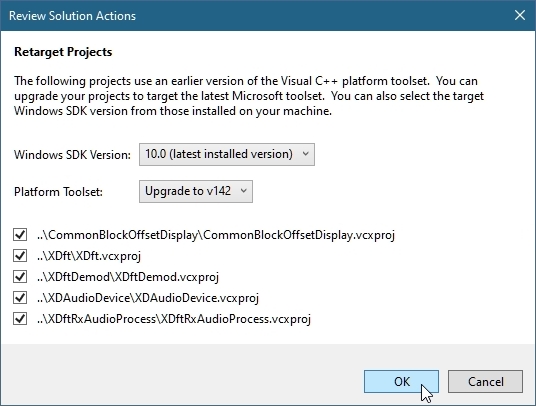
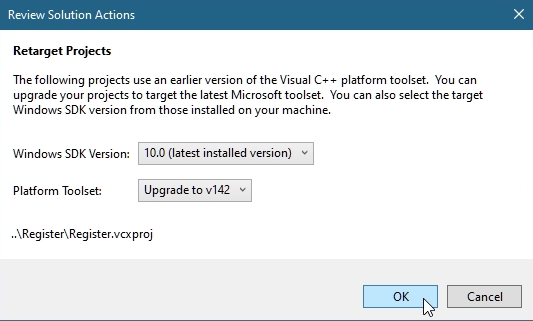
17. A window will pop up asking to upgrade your project to the latest Microsoft toolset. Click OK.
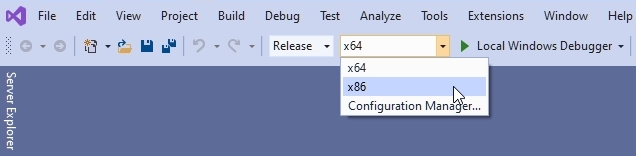
18. In the Visual Studio toolbar, use the pull-down menu to select “Release”.
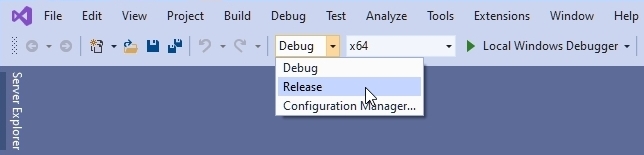
19. Next to Release, use the other pull-down menu to select “x86”.
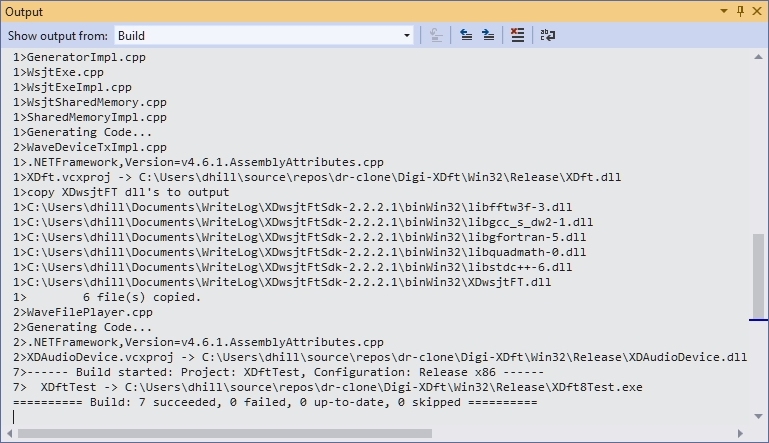
20. Use the Build pull-down menu and select “Build Solution”.
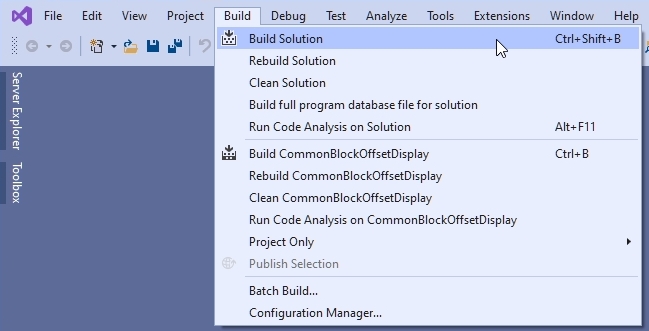
21. Watch the build take place in the Output screen. When completed, you should see “Build: 7 succeeded…” as the last line. (NOTE: If you get errors during the build, they will show in the Output screen and Error List. This has happened to me and each time it was because I messed up and didn’t have the correct address in either the .props files. If this happens, it’s best to delete the dr-clone directory and start over from scratch.)
22. Use the Switch Views pull-down menu in Solution Explorer to select the DigiRite.sln solution.
23. When prompted to upgrade your project, click OK.
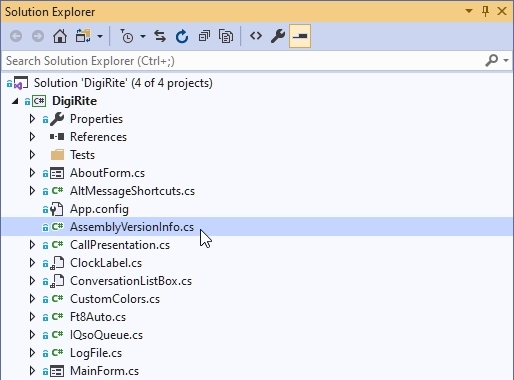
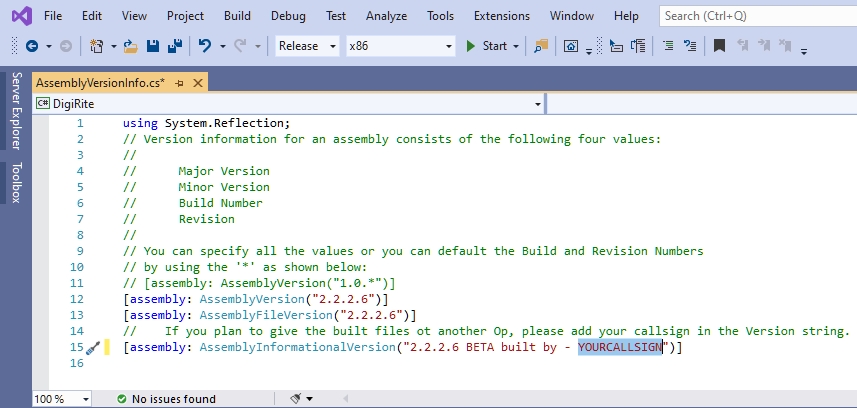
24. Before building this solution, there are two files that need to be edited. Open the DigiRite tree and locate the file “AssemblyVersionInfo.cs”. Click to open it.
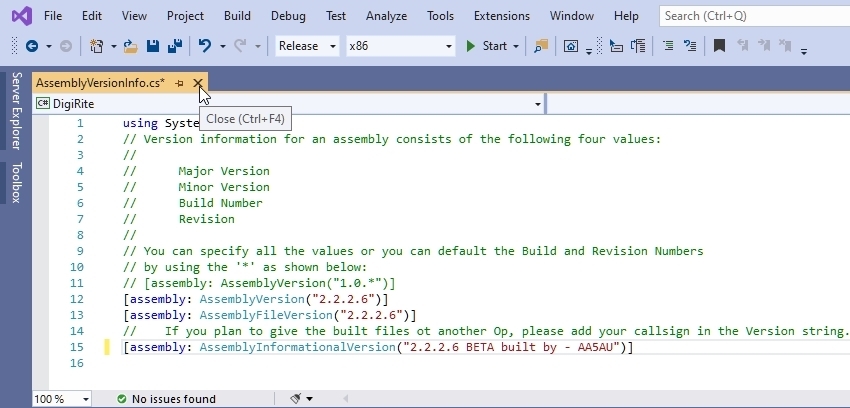
 25. Highlight YOURCALLSIGN and replace it with your actual callsign. When finished, save the file using the diskette icon on the toolbar and close the file using the X.
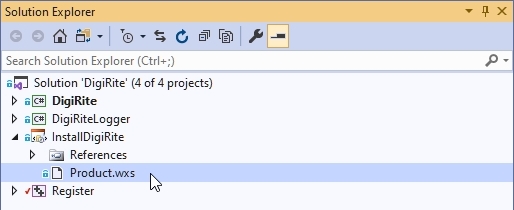
26. Expand the “InstallDigiRite” tree using the arrow to the left and click “Product.wxs” to open it.
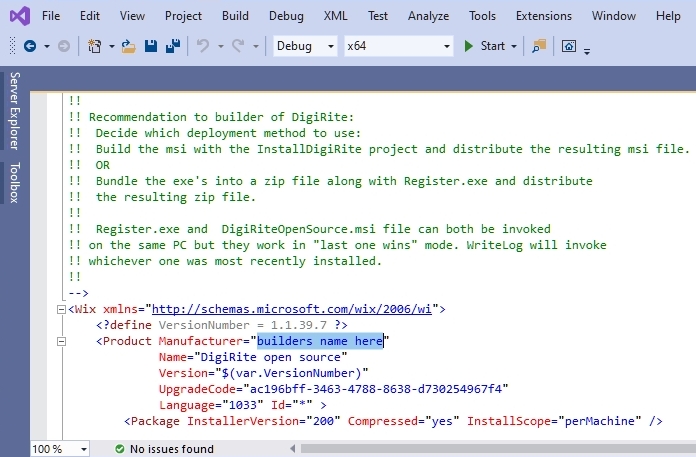
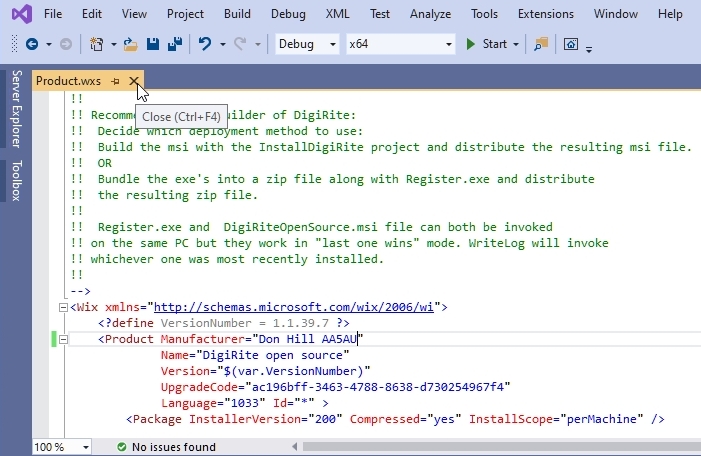
27. Scroll down until you see “builders name here”. Highlight the text and type in your name and callsign.
28. When finished, save the file using the diskette icon on the toolbar then close the file using the X.
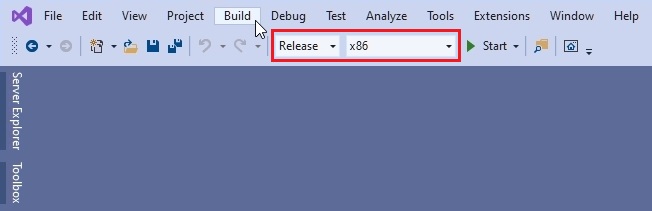
29. You are now ready to build the DigiRite.sln solution. Use the pull-down menus on the toolbar to select “Release” and “x86”, then go to the Build menu and select “Build Solution”.
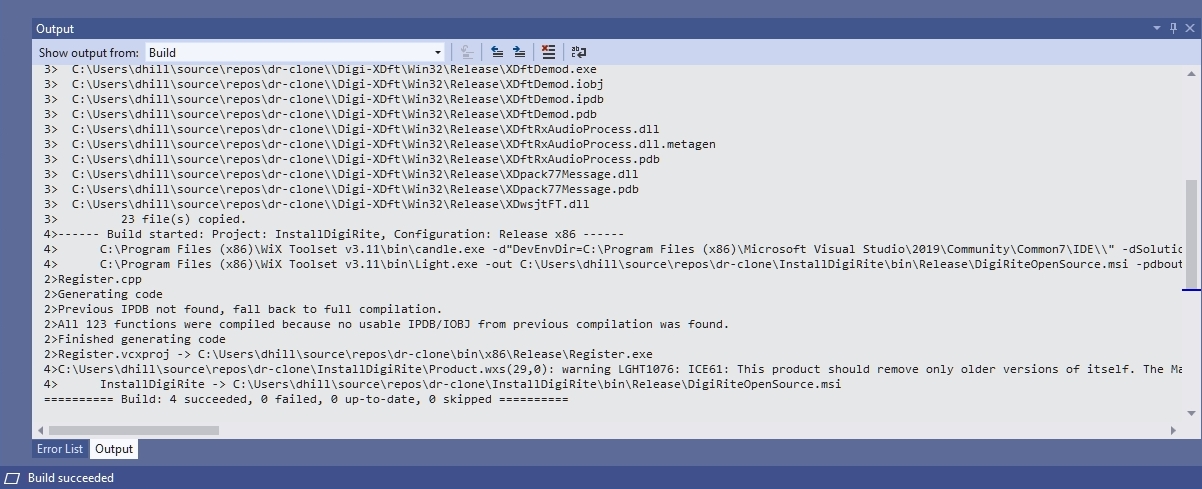
30. Watch the progress of the build in the Output screen. When finished you will see “Build: 4 succeeded…”. The build is complete! You can close Visual Studio.
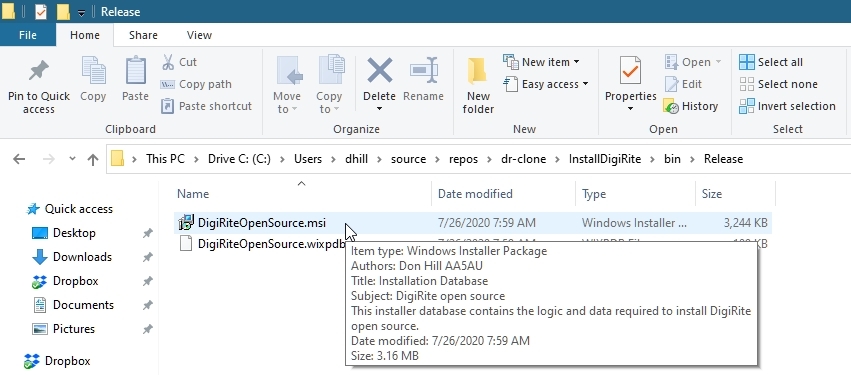
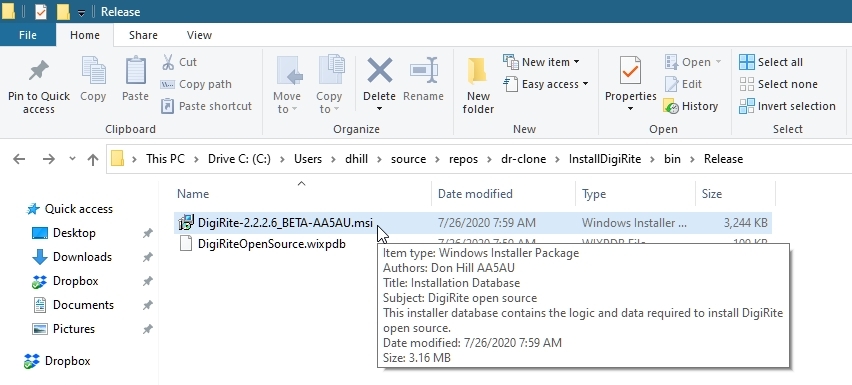
31. Locate the MSI installation file. It is located in the “InstallDigiRite/bin/Release” folder as shown below. Rename the file so that it depicts the current version. I renamed mine “DigiRite_2.2.2.6_BETA-AA5AU.MSI” for this particular beta.
32. Double-click the MSI installation file to run it. You may be prompted by Windows User Account Control to allow access. If so, click “Yes”. This installs the beta on your PC.
You can also use this MSI file to install the beta on another PC. It is advisable that you copy it elsewhere on your computer. I do this because when I’m finished installing the current beta, I delete the “dr-clone” directory so I have a new clean work directory for the next beta. In other words, I always use “dr-clone” to build all new betas.
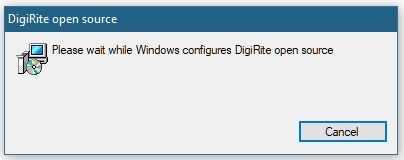
When the installation completes, the “DigiRite open source” window disappears and nothing else happens. You are ready to test it out on the air.