
WriteLog Version 12 Menus
The menu selections at the top of the main log window remained the same in WriteLog version 12 (V12) as they were in version 11 (V11) with the one exception. The Window menu in Version 11 is now called the Windows (plural) menu in Version 12.
In V12, the Edit, Entry, Radio, Bands, Contest, and Help menus have all remained the same as V11, but the contents of the File, View, Setup, Windows and Tools menus have changed.

Fig. A
On this page we will compare V12 File, View, Setup, Tools, and Windows menus to those in V11 and discuss some of the changes. In the screenshots below, the white menus are from V12 and the gray menus are from V11. The reason for the size difference is due to them being on different computers with different Windows operating systems.
The file menu selections of V12 (left) as compared to V11 (right).

Fig. B
The most notable change to the file menu is there is no longer an Export sub-menu. The Export sub-menu in version 11 shows the following options which allow users to save the log in various formats.
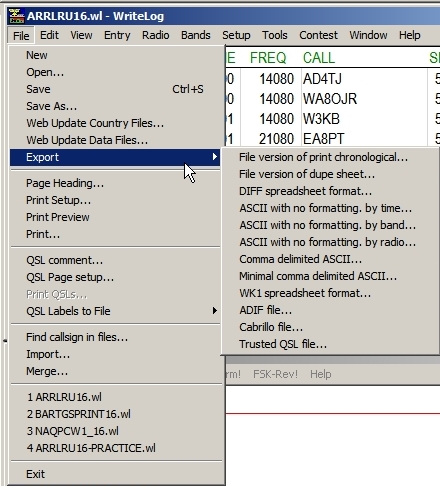
Fig. C
These options did not go away in V12. Instead they are combined into the “Export Copy As” menu selection.
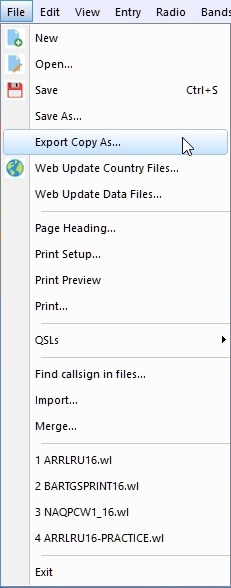
Fig. D
When you click “Export Copy As” in the File menu, the “Export Copy As” dialog box will open. Use the “Save as type” drop-down menu to select the type of file you wish to save. Notice the Cabrillo file option is not available here. Instead, Cabrillo files can be created either by using the Cabrillo button on the Windows toolbar or via the Cabrillo file option in the Contest menu.
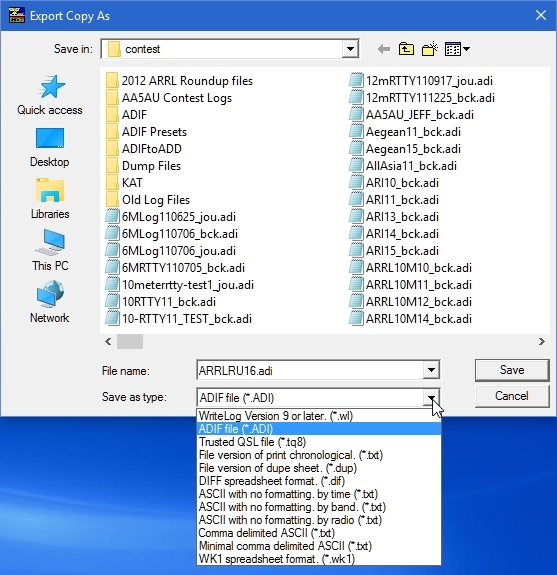
Fig. E
The other difference in the File menu is that the QSL comment, QSL Page setup and QSL Labels to File sub-menu items in V11 (Fig. F) are now combined in a QSLs sub-menu in V12 (Fig. G).
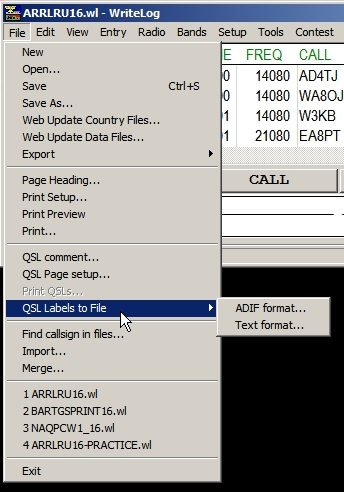
Fig. F

Fig. G
The View Menus are relatively the same with two changes. The “Lock docked windows” that is available in V11 is no longer needed in V12. In V12, there is now an option to select toolbars to view.
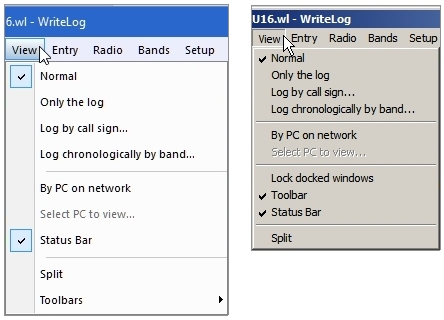
Fig. H
The Toolbars option in the View menu allows users to show or hide the File and Windows Toolbars.
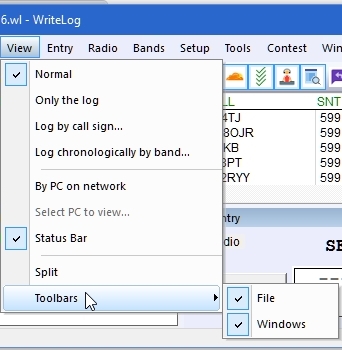
Fig. I
Although the Setup Menu has only one change, it is a major one. In V12, an SDR Setup menu item has been added. In V12, you can connect an SDR and have a spectrum display show up on the Band Map as shown in Fig. K. Note in the Fig. K screenshot that the BandMap is horizontal. In V12, the BandMap can be either horizontal or vertical.
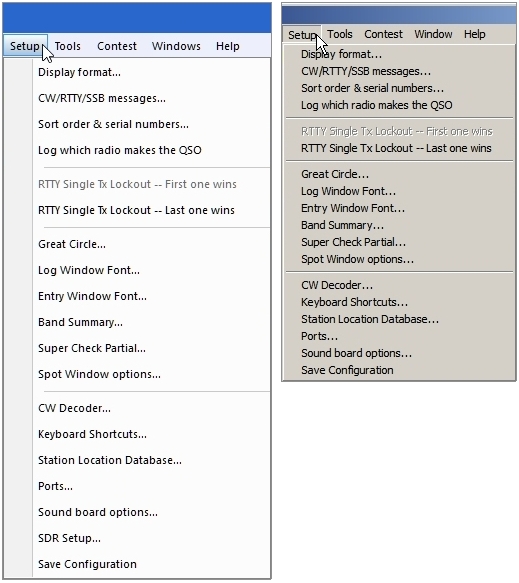
Fig. J
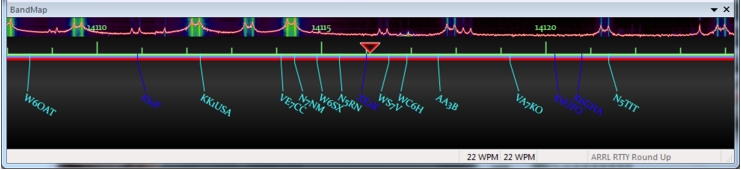
Fig. K
Clicking the SDR Setup option in the Setup menu brings you to the SDR Setup window tab of WriteLog Options where you can set up parameters for your SDR.
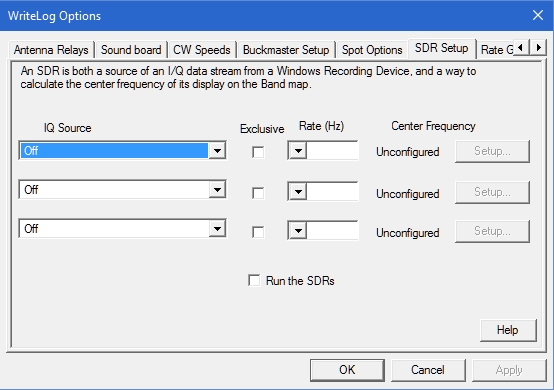
Fig. L
The only change in the Tools menu is that the Graphs option available in V11 has been removed. Graphs are now available in the Windows menu and are offered in real time in V12.

Fig. M
The Windows Menu looks completely different in V12 because it now has images next to some of the menu items. These are the same images that show up on the Windows Tool Bar.
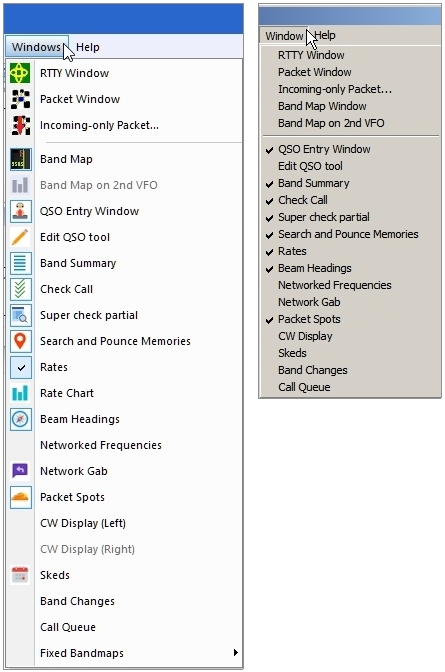
Fig. N
The first change noted is that there is no longer a “Band Map on 2nd VFO” entry in V12. “Band Map on 2nd VFO” can still be accessed by right-clicking the mouse with the cursor in the Entry Window.
Another change is “CW Display” is now available for both Left and Right channels of a single sound card.
At the very bottom there is a new menu option called Fixed Bandmaps.
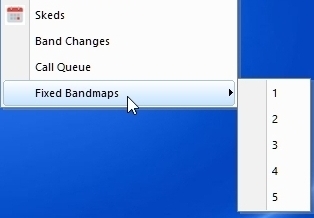
Fig. O
Fixed Bandmaps is new to the Windows menu in V12 but is not a new feature. In V11, this feature is available from the File menu in the Bandmap window (Fig. P). It is called “New view” in V11.
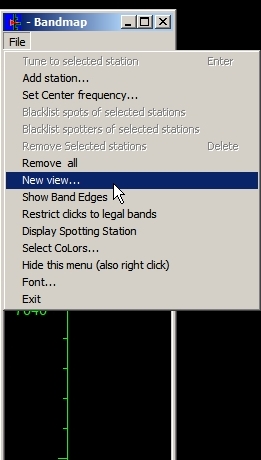
Fig. P
Fixed Bandmaps are not controlled by a radio or Entry Window. They are simply fixed Bandmaps that can be displayed so the user can monitor activity on other bands when connected to a Packetcluster. There are five (5) available so a Bandmap can be created for each band and displayed, perhaps on a second monitor, so the user can monitor all bands at once. Fig. Q is an example of having fixed band maps on 10, 15 & 20 meters at the same time.
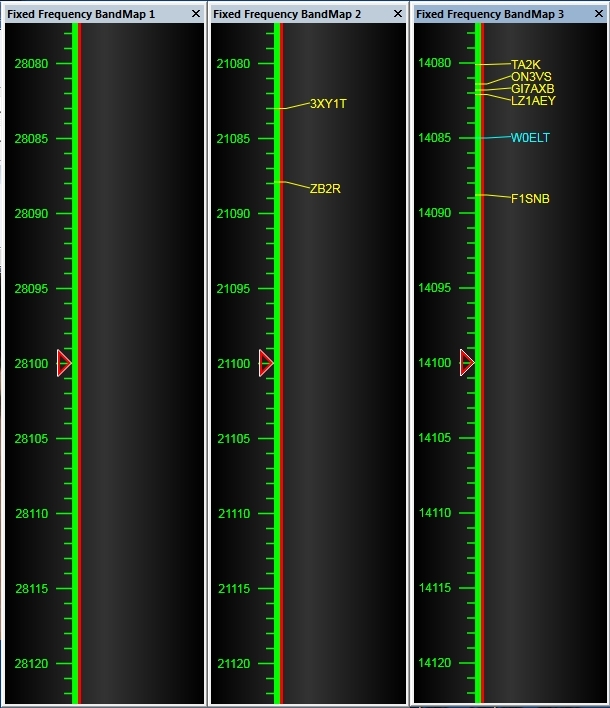
Fig. Q
To set up a Fixed Bandmap, click Fixed Bandmaps in the Windows menu and a new Bandmap window will appear. At first it will be docked to the main log window. Drag it away from the main log window and resize it. Since Bandmaps in V12 do not have a File menu, right-click inside the new Bandmap window and then click “Select Center Frequency”. Entry the center frequency you want to use for the bandmap and it will then show the frequencies of the band you want to monitor.
This brings up to the end of the changes to the V12 menus.