
WriteLog Version 12
New WriteLog 12 Features
- WriteLog V12 Start Menu
- WriteLog Help PDF
- Starting WriteLog Version 12 the First Time
- Exporting Current Settings to an .ini File
- Edit INI Option
- Toolbars
- Docking and Undocking Windows
Also, check out the differences between WriteLog V12 menus & WriteLog V11 menus here.
WriteLog version 12 was released in January 2016. It includes many new and upgraded features. Some, but not all new features, are shown here. All the changes incorporated into version 12 can be found on the WriteLog website Revision History page for version 12 here.
After downloading and installing WriteLog version 12, you will find a new WriteLog V12 folder in the start menu which includes all WriteLog-installed programs plus shortcuts to the WriteLog Manual and Release Notes as shown in Fig. A.
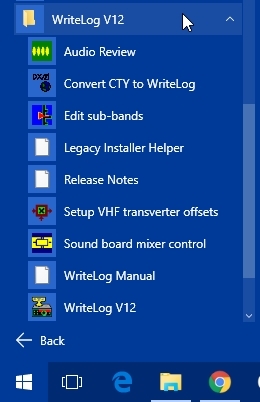
Fig. A
Look at the list of programs and you should recognize them as they are similar to those installed with version 11. You will notice there is no longer a shortcut to “Edit writelog.ini”. This is because the writelog.ini file is no longer used to hold the parameters which are set in WriteLog. More on this later.
There is something new for version 12 that was not available for version 11. The Help file can now be downloaded in PDF format from the Downloads – WriteLog Versions page on the WriteLog website. It looks something like this.

This particular PDF is for version 12U. The version number will change according to whatever the current version is.
What’s nice about the PDF is that you can search the document using CTRL-F. For some, this may be easier than searching the actual Help file.
Starting WriteLog Version 12 the First Time
The first time you start WriteLog version 12, a dialog window will open asking if you would like to import the writelog.ini file and it will show the path to the location of that file (Fig. B). Unless you want to start with defaulted settings, you should choose Yes. Importing the writelog.ini file brings all of your previous WriteLog parameters into the program except the positions of the windows. Positions of windows are not stored in INI files.

Fig. B
Exporting Current Settings to an INI File
After importing writelog.ini, open an existing log or start a new log. Make any changes you want, then Save the Configuration and Save the file, then close WriteLog. Now restart WriteLog. On the opening screen, choose to Export as shown in Fig. C.
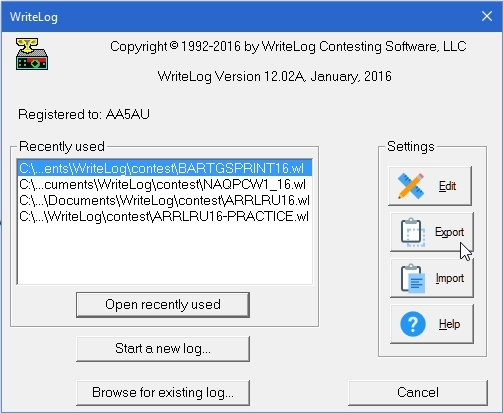
Fig. C
When the dialog screen opens, navigate to a location where you will save the INI file which contains your current settings. I created a new folder under my WriteLog folder named “Ini files” and save my INI files there as shown in Fig. D. It’s best to leave the original writelog.ini file alone after it has been originally imported. This way it will always be there as a starting point. Writelog.ini does not get deleted during any uninstall of WriteLog.
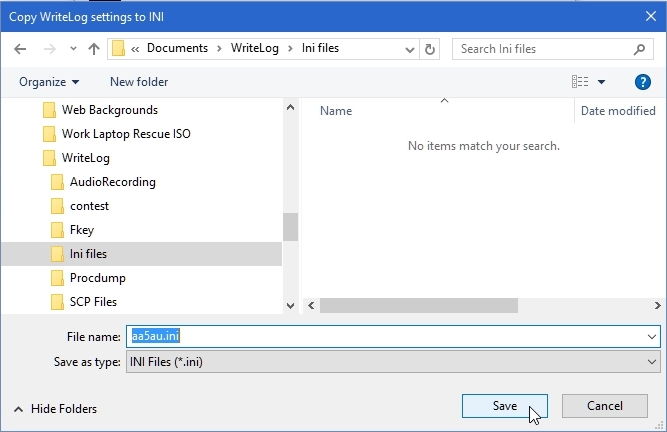
Fig. D
The Edit button on the opening screen allows you to edit an INI file. There are two options when doing this.
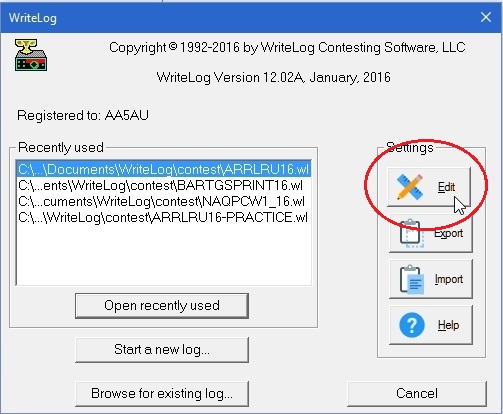
Fig. E
The first option is where you create a new file that contains all the settings that are in the registry – these are your current settings. When you click on Edit from the opening screen, the “Copy WriteLog settings to INI” dialog screen opens. To create a new INI file, type in the file name and click Save.
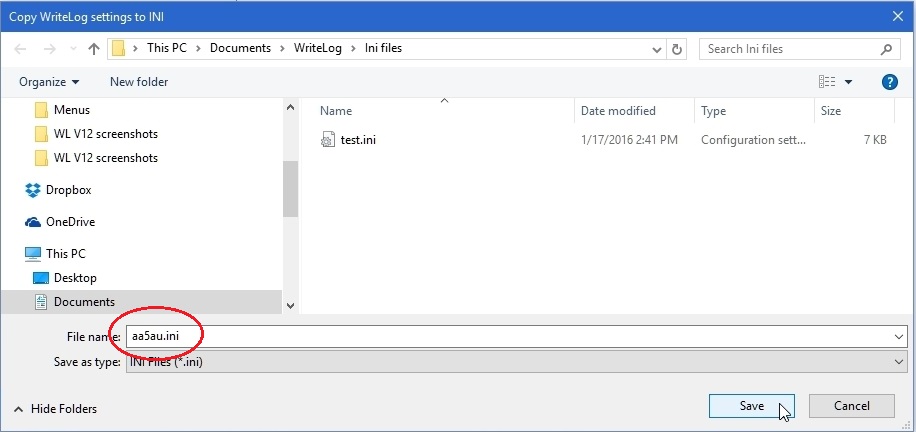
Fig. F
When you click Save at the “Copy WriteLog settings to INI” screen, the current settings will be displayed in Notepad file with whatever name you typed in Fig. F (shown in red circle).
You can now edit the settings in Notepad. When finished editing, Save the file.
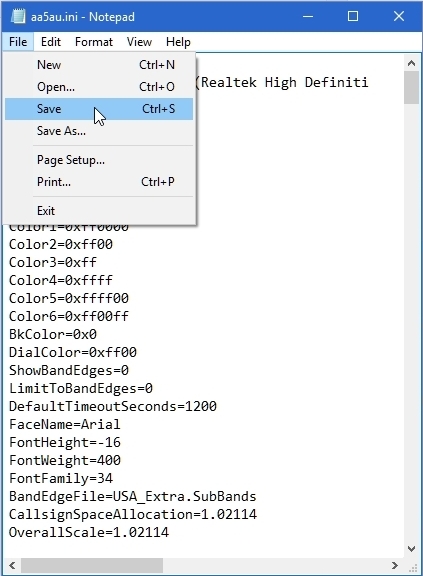
Fig. G
After saving the file, close Notepad by clicking the X in the upper right-hand corner of the window. When you close Notepad, a dialog box will appear. Click Yes to load edited settings.
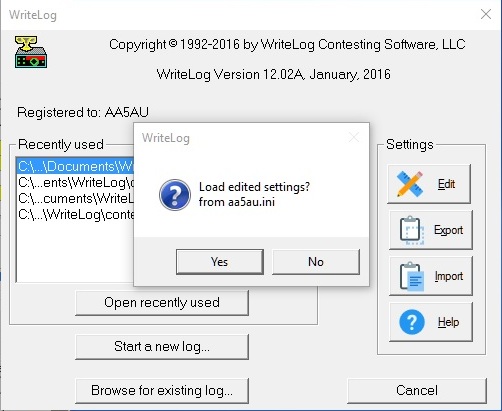
Fig. H
The other way to use Edit is to write over an existing INI file. Click Edit from the opening screen. Then click on the name of the file you want to overwrite.
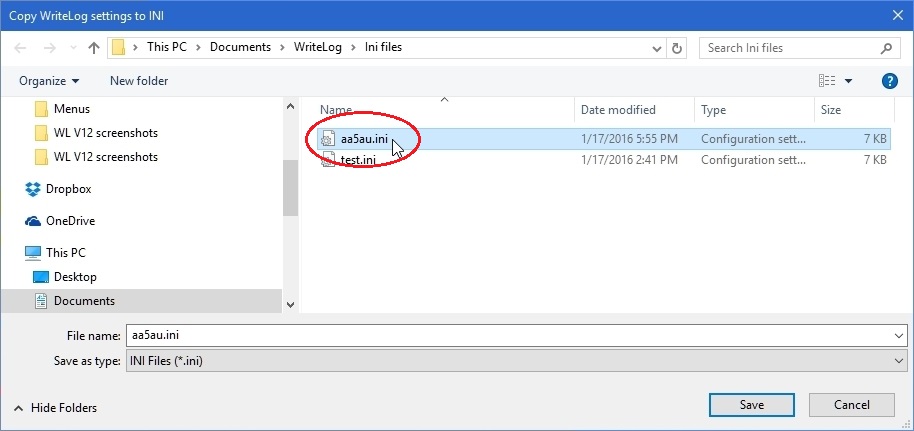
Fig. I
When you click Save in the “Copy WriteLog settings to INI” dialog screen, a “Confirm Save As” dialog screen will appear asking if you want to replace the existing file. Select Yes to replace the existing file with a file of the same name which will contain the current settings.
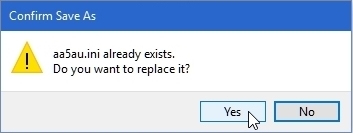
Fig. J
Selecting Yes in the “Confirm Save As” dialog box will cause Notepad to open automatically and show your current settings. You can now edit the file, then save it. When you close Notepad, you will be asked if you want to load edited settings (Fig. H). Click Yes. You can then either start a new log or open an existing log from the opening screen and any changes made the INI file was edited will take effect.
The old File toolbar in version 11 has been changed and expanded in version 12 and a new Windows toolbar has been added.
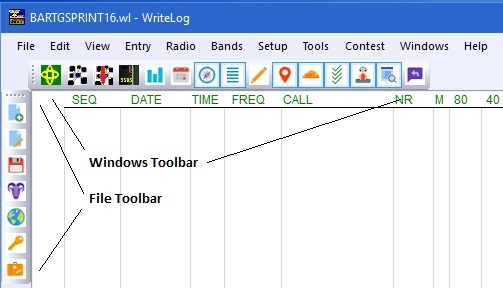
Fig. K
On the File Toolbar are buttons to start a new file, open an existing file, save a file, export to Cabrillo file, download and install country files, export as Trusted QSL file, and export to ADIF.
On the Windows Toolbar are buttons to open/close the following windows: Rttyrite, Packet, Incoming only Packet, Band Map, Rates, Sked, Beam Headings, Band Summary, Edit QSO Tool, Search and Pounce, Packet Spots, Check Call, QSO Entry, Super Check Partial, and Gab.
Hover the mouse over any of the toolbar buttons to show the description of the toolbar. Additionally, the toolbars can be moved within the log window by dragging them. They can be either vertical or horizontal. They can also be undocked from the main log window.
Most of the windows in version 12 will start out being docked to the main log window when first opened. To undock them, just drag them away from the main window with the mouse. This is the same as with version 11. All windows can be resized and moved. What’s different in version 12 is the way windows are docked.
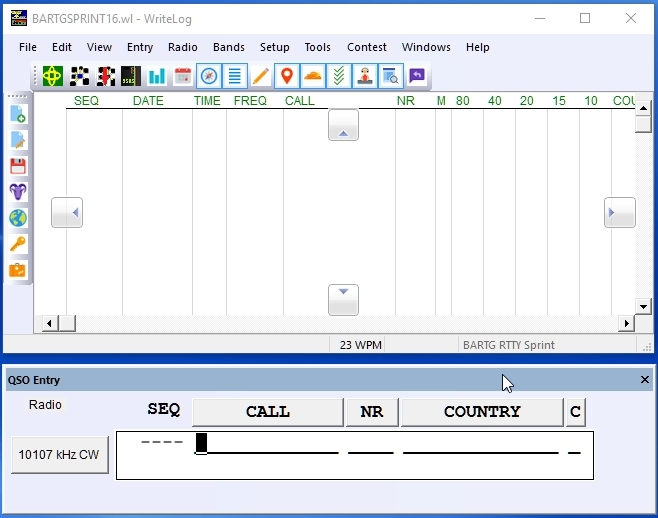
Fig. L
When a sub-window is dragged with the mouse (in Fig. L above the QSO Entry window is being dragged by the mouse.), notice four arrow locators pointing up, down, left and right, in the main log window. If you want to dock the QSO Entry window to the top or bottom of the log window, you simply bring the mouse cursor to either the top arrow locator or bottom arrow locator and release.
In Fig. M below, the QSO Entry window is in the process of being docked the bottom of the main log window. The QSO Entry window is dragged to where the cursor is inside the bottom arrrow locator as indicated in the red circle. Notice the grayish blue shaded area in the lower part of the main log window. This denotes where the window will reside once it is released by the mouse. In this example, the QSO Entry window can only be docked to the top or the bottom of the main log window. This may happen with other windows as well as it is impractical to dock them to the left or right.
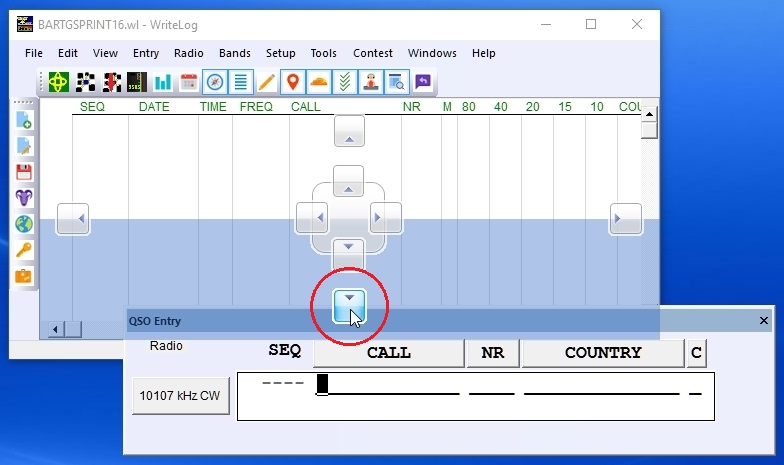
Fig. M
Additionally, some windows can be docked to the QSO Entry window as well. In Fig. N, the Super Check Partial window is being docked to the left side of the QSO Entry window. Notice where the cursor of the mouse is located in order to dock this window and notice the shaded area showing where the window will reside once it is docked.
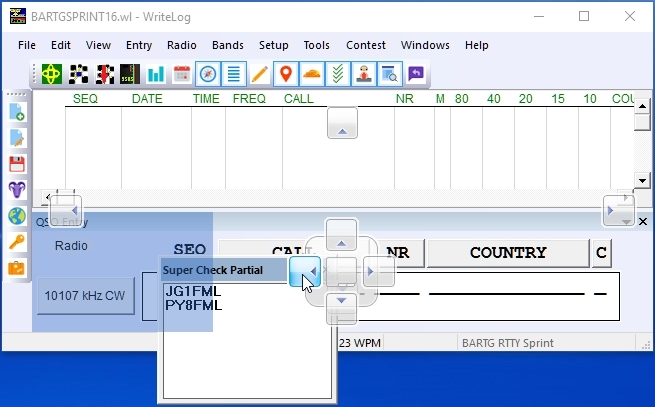
Fig. N
Figure O shows the result of docking the Super Check Partial window to the QSO Entry window. Not all windows can be docked to other windows. So far, only the main log window and the QSO Entry windows can have other windows docked to them. In some cases, after the windows are docked, some adjustment may be needed to make the appearance exactly as you like. The Rttyrite cannot be docked to other windows and other windows cannot be docked to it.
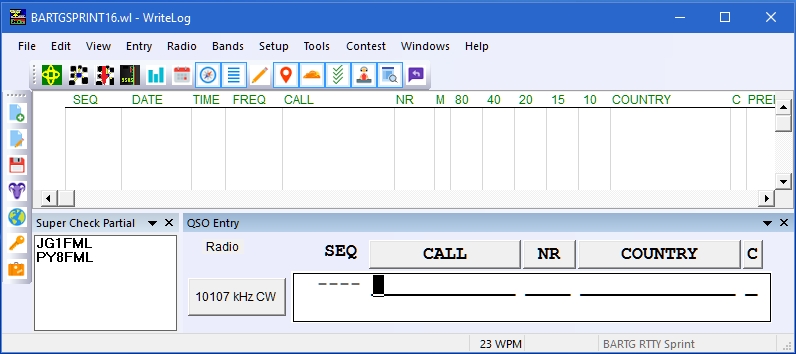
Fig. O