
Rttyrite Window
The Rttyrite Window – an Overview
Rttyrite is the name of the RTTY window in WriteLog. There are two types of Rttyrite windows – main and clone. The first RTTY window opened from a particular Entry Window is considered the main Rttyrite window. Each Entry Window can have one main Rttyrite window and as many as ten clone windows associated with it, although this is impractical. If used, usually two or three clone windows are enough to give you diversity in decoding RTTY signals. To run RTTY with WriteLog, you must have at least a main Rttyrite window open. However, you do not need any clone Rttyrite windows if you don’t want them. Clone windows are simply receive-only RTTY windows. Transmitting RTTY is done from the main Rttyrite window only although you can click on callsigns and reports in the clone windows to fill the Entry Window.
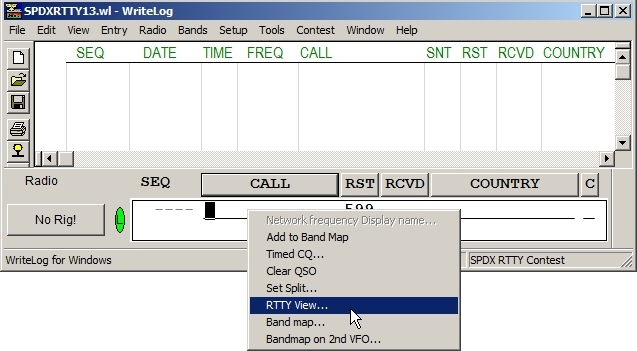
The main Rttyrite window is opened in one of two ways. With the keyboard focus in an Entry Window, a main Rttyrite window can be opened by either selecting RTTY Window from the Window menu or by right-clicking the mouse inside the Entry window and selecting RTTY view. The Rttyrite window that is opened is associated with that Entry Window.
This screen shows a main Rttyrite window opened by selecting RTTY Window from the Window menu.

This screen shows a main Rttyrite window opened by right-clicking the mouse inside the Entry Window and selecting RTTY view.
Since it’s possible to have up to four Entry Windows with WriteLog, you can have a main Rttyrite window for each Entry Window. Multiple Entry Windows are used when multiple radios or VFOs are used. If you operate SO2R (single op, 2 radios) or SO2V (single op, 2 VFOs), you would open two Entry Windows – one for each radio if SO2R, or one for the main VFO and one for the sub VFO if SO2V. Not all radios have the capability of outputting audio from each VFO separately, but if you had two radios that did, you could have four Entry Windows open – one for each VFO of your two radios. But this is getting into advanced RTTY contesting and is not the focus of this tutorial. It’s merely mentioned to get the point across that each Entry Window has its own main Rttyrite window, and subsequent clone windows if used.
For this tutorial, only one Entry Window and one main Rttyrite window will be shown. If you ever plan to run SO2R, SO2V or SO3R, you can use the information learned about one Rttyrite window and apply to others as needed. When a Rttyrite window is opened, it will need to be resized and moved so it does not overlap the main WriteLog window or any other windows. The Rttyrite window looks like this.
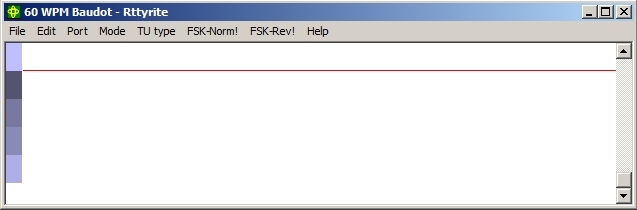
The Rttyrite window has eight menus. The first menu is the File menu.
File menu options
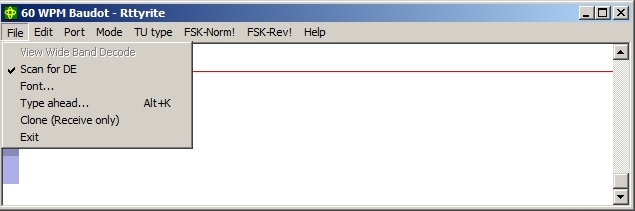
View Wide Band Decode – This option is only available when using WinRTTY. WinRTTY is WriteLog’s native soundcard modem much like MMTTY or 2Tone. WinRTTY is activated by choosing either Sound Board AFSK or Sound Board FSKfrom the TU type menu.
Scan for DE – When selected, any callsign followed by DE will be highlighted in the Rttyrite window.
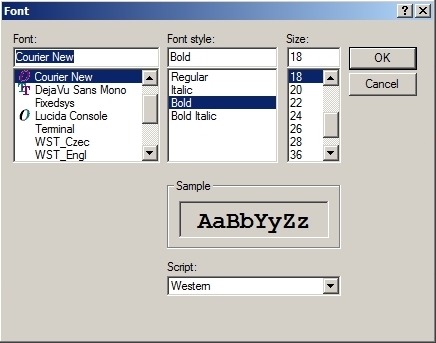
Font – When selected, a window pops open where you can select a font, font style and size. Note that whenever you change a font setting, it does not come into affect until the Rttyrite window is closed and reopened. Also, the font, font style and size selected in the main Rttyrite window applies to any and all clone Rttyrite windows as well.
Type ahead… Alt+K – When selected, it brings up the Type Ahead window. Here you can type a message. This message can then be sent using the Transmit button. Selecting Type ahead… Alt+K will not automatically key the transmitter. 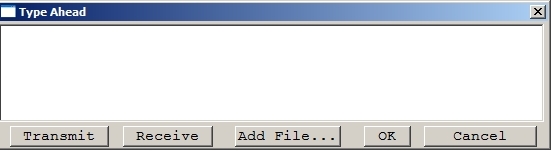
If you wish to go “live” at the keyboard, you can use Alt+K (hold the Alt key and then hit the K key on the keyboard). Alt+K can only be used when the keyboard focus in in the Entry Window. When you type Alt+K, a window will open where you type in a message. When finished, use Alt+K to end the transmission and close the window.

Clone (Receive only) – Selecting the Clone option will open a clone Rttyrite window. Clone Rttyrite windows are receive only windows that enable users to run more than one decoder at a time to gain more diversity when receiving RTTY. Clone windows are explained in detail on the Using Rttyrite Clone (Receive-only) Windows page. Clone windows can only be opened from the main Rttyrite window.
Exit – This closes the Rttyrite window.
Edit menu options
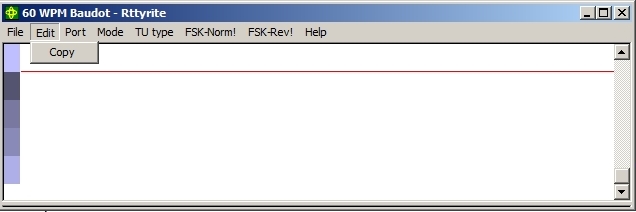
Copy – Copy is the only Edit menu option. This allows you to copy the contents of the Rttyrite screen which can then be pasted into a text editor such as Notepad.
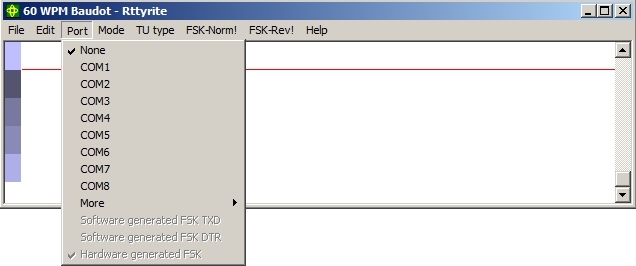
None – When None is selected, no COM ports are active in Rttyrite.
COM1 through COM8 – COM ports in the Port menu usually refer to the serial COM port where an FSK and/or PTT interface is connected. It can also be the serial port where a hardware TNC, such as a HAL DXP-38, PK-232 or KAM, is connected. Only one COM port is allowed to be used at any time.
More – This shows additional COM port options COM9 through COM16.
Software generated FSK TXD – When selected, it allows FSK transmission from the TxD pin of a USB-to-serial port adapter but limits FSK baud rate to 45 baud or 60 WPM.
Software generated FSK DTR – When selected, it allows FSK transmission from the DTR pin of a USB-to-serial port adapter but limits FSK baud rate to 45 baud or 60 WPM.
Note: Software generated FSK is not limited to use with USB-to-serial adapters although these options were created to allow USB-to-serial adapters to transmit 5-bit Baudot. Software generated FSK can be invoked when using a legacy COM port although normally Hardware generated FSK is used with legacy COM ports. Regardless, the transmission is limited to 45 baud or 60 WPM with Software generated FSK.
Hardware generated FSK – This option is used when FSK is generated from the TxD pin of a legacy serial port. This allows RTTY transmission at baud rates of 45, 50, 57 and 75 baud.
Note: If you use a microHAM interface, detailed instructions on setting up your device with WriteLog can be found on the support page on the microHAM USA website at http://microham-usa.com/store/cmspage.php?page_id=11.
Mode menu options
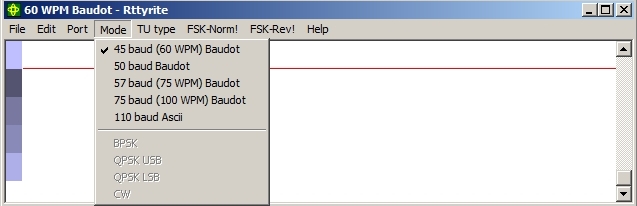
45, 50, 57, 75 baud Baudot & 110 baud Ascii – These options control the speed and mode of both RTTY and ASCII transmission depending on the TU type selected.
BPSK, QPSK USB, QPSK LSB, CW – These are mode selections only available when AFSK Sound Board (WinRTTY) is selected as TU type.
TU type menu options
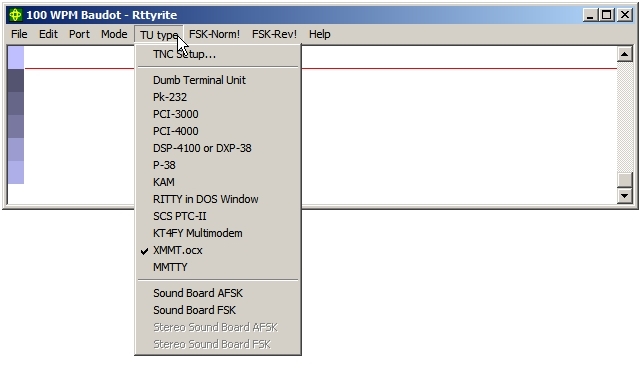 The TU type menu is where you select which type of RTTY modem you will be using. TU stands for terminal unit, which historically has meant a device or modem used for RTTY.
TNC Setup – After selecting a TU type from the list, use this selection for more options when setting up that particular TU type. The result of selecting this option will vary depending on the TU type selected in the list.
Dumb Terminal Unit – This option is selected when using a terminal unit, such as a HAL ST-8000 connected to a COM port.
Pk-232 – Refers to the older AEA PK-233 or PK-233MBX models as well as the newer PK-232DSP by Timewave.
PCI-3000, PCI-4000, DSP-4100 or DXP-38, P-38 – These devices were manufactured by HAL Communications.
KAM – This selection is used for KAM, KAM Plus and KAM XL by Kantronics.
RITTY in DOS Window – Use this selection for running RITTY by K6STI in a DOS window.
SCS PTC-II – Select when using the PTC II TNC by SCS.
KT4FY Multimodem – Select when using a KT4FY Multimodem.
XMMT.ocx – Select when using XMMT.ocx support for both 2Tone and MMTTY.
MMTTY – Select when using the MMTTY plug-in for WriteLog.
Sound Board AFSK – Selecting this option sets Rttyrite to use AFSK with WinRTTY, which is WriteLog’s native sound card modem.
Sound Board FSK – Selecting this option sets Rttyrite to use FSK with WinRTTY.
Stereo Sound Board AFSK – Used when operating SO2R one a single stereo soundcard for AFSK with WinRTTY. This option requires additional set up as described in the WriteLog Help File.
Stereo Sound Board FSK – Used when operating SO2R on a single stereo soundcard for FSK with WinRTTY. This option requires additional set up as described in the WriteLog Help File.
FSK-Norm! & FSK-Rev! – These options invert RTTY but only with certain TU types. When running AFSK, it inverts both transmit and receive. When running FSK, it only inverts reception.
Help menu options
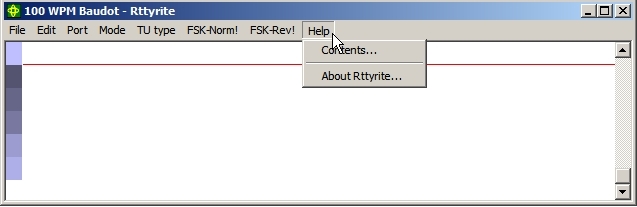
Contents – Opens the WriteLog Help File to the Rttyrite section,
About Rttyrite – Show the current version of Rttyrite.