
WriteLog RTTY Starter Page 14
Using the Band Map with a Packetcluster
Contesting with a Packetcluster is a lot of fun with WriteLog. By using the Band Map in conjunction with the Packet Spots window, you can point & click to new stations as they are spotted. Double-click on a callsign in either the Packet Spots window or Band Map and your radio is instantly placed on the spotted station’s frequency. It’s almost too easy.
Establishing a Packetcluster connection will not be covered here. The WriteLog Help files and K9JY WriteLog website are better suited for that. After you have established a Packetcluster connection with the Packet Window, you will need to open both the Band Map and Packet Spots Window (do not confuse the Packet Spots window with the Packet Window – they are different).
The Packet Spots Window
The Packet Spots Window is only used when you have a Packetcluster connection. Incoming packet spots are shown in this window and the spots are placed onto the Band Map as well. Double clicking the mouse on a spot in the Packet Spots window moves the radio to the frequency of the spot. (You must first have the Packet Window open for the Packet Spots window to work.)
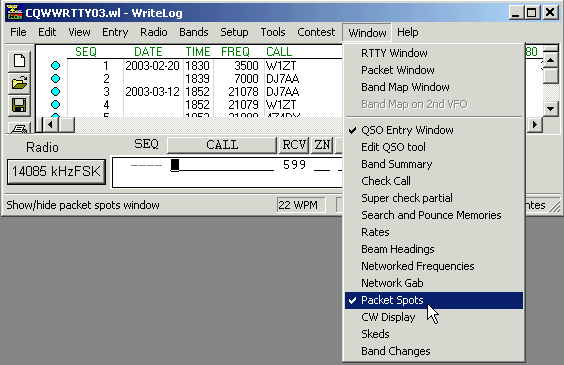
The Packet Spots window is opened from the Window menu in the main WriteLog screen.
The Packet Spots window can be resized to fit into your screen set-up and contains several important options. One of the most important options is the “In-band Only” option. Some discussion is required here to clarify what “In-band” means. It actually means “In-sub-band”. WriteLog has pre-set mode sub-bands by default. These default sub-bands work fine for SSB and CW but RTTY is a different story.
Ideally, when running a RTTY contest, it’s desired to have only RTTY spots show up in the Packet Spots window. Activating �In-band Only� does this. But because WriteLog has no way of telling if a spot coming in is a RTTY spot or not, it uses sub-bands to determine if the spot is a good spot for the contest. This is a difficult subject to explain and may be even more difficult to understand. Detailed discussion is required.
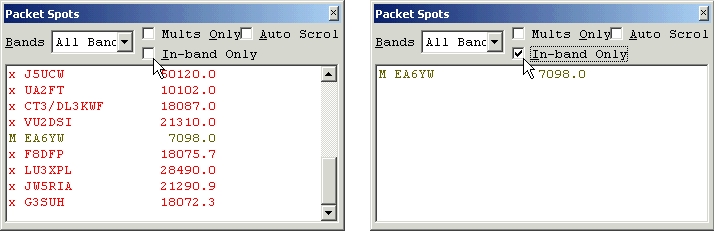
Let’s start out by looking at the Packet Spots windows shown below. They are actually the same window before and after “In-band Only” is activated. (Note: The Packet Spots window changed in 2004 with the addition of a 4th check box for Azimuth Sort not shown here. Also, beam headings are now shown in the Packet Spots window to the right of the spots. For the correct azimuth to show, you will need to set your latitude & longitude within WriteLog. This is explained on Page 16.)
WriteLog knows what mode you are operating. Since you are operating a RTTY contest, WriteLog looks at the sub-band for RTTY to determine if the spot is RTTY spot. In the above example, all the spots in red are outside the default RTTY sub-bands. The one spot shown in green is supposed to be a good RTTY spot. However, this is another problem. Because RTTY sub-bands share with both CW and SSB sub-bands, it’s nearly impossible to tell if the spot is good for RTTY or not, especially on 40 meters. In our example, EA6YW is the only station listed that could possibly be a RTTY spot.
Unfortunately it’s not a RTTY spot. It was actually an SSB spot. RTTY contacts can be made on 7098.0 kHz, but so can SSB (and CW) contacts in many parts of the world. At least by invoking “In-band Only” we have eliminated spots that we know are not RTTY. Let’s look at another example.
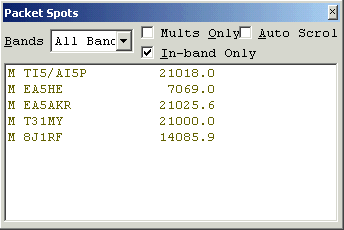
Here we have several stations spotted which could possibly be RTTY spots because they fall within the default RTTY sub-bands created by WriteLog. But obviously something is wrong because only 8J1RF is a RTTY spot. EA5HE is a SSB spot and the others are CW spots.
So how are you going to determine what’s RTTY, what’s SSB and what’s CW? You do that by editing the default sub-bands to show typical RTTY sub-bands instead of legal RTTY sub-bands.
Editing the RTTY sub-bands
Before going into a lot of detail on editing the sub-bands, it should be known that all this can be avoided by using a program called DXTelnet (and there may be other programs that do this as well) in conjunction with WriteLog. DXTelnet has the ability to filter spots better than WriteLog and to send only RTTY spots to WriteLog. I use DXTelnet exclusively with WriteLog and highly recommend it. For more information on using DXTelnet with WriteLog on a single computer click see the WA9ALS DX Telnet Page on John’s website. Instructions on setting up DXTelnet with WriteLog over a LAN are shown in another tutorial here. Check the Tutorial Page.
By default, the RTTY sub-bands are set to legal RTTY frequencies. For example, on 20 meters, the legal RTTY sub-band for most of the world is from 14000 to 14150 khz and that is how the default sub-band for RTTY on 20 meters is set. However, most RTTY contest contacts are made from 14075-14120 khz on 20 meters (sometimes above and below these frequency in major contests like the ARRL RTTY Roundup, CQ WW RTTY & CQ WPX RTTY). So in order to better “filter” spots that show up in the Packet Spots window when the “In-band Only” option is activated you must edit the RTTY sub-bands. How do you that?
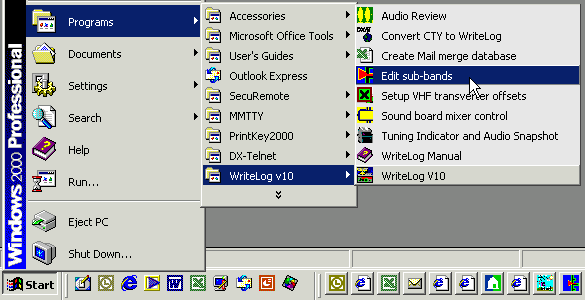
There is a program called EditBands.exe that comes with WriteLog. You run this program to modify the RTTY sub-bands. You can run the program by going to the Windows Start menu, to Programs and then to the WriteLog group as shown.
Close WriteLog if you have it open. Open Edit sub-bands. Click the + sign to show the current Digital (RTTY) sub-bands. It will look like this.
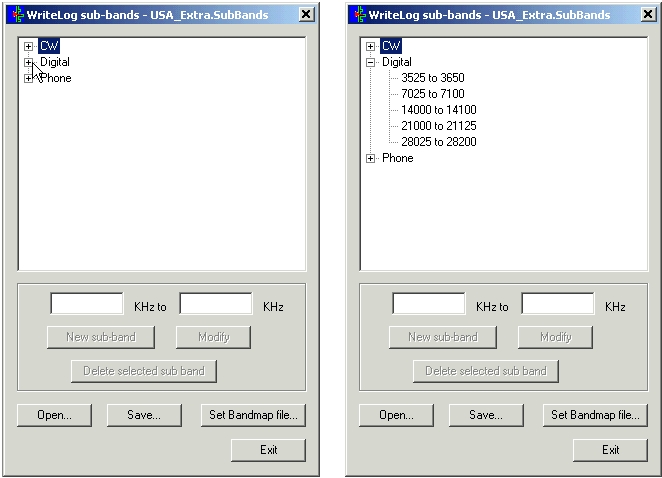
The Edit sub-bands program has many options and this can be confusing. For USA stations, the sub-bands are broken down into three separate license classes – Extra, Advanced and General. For setting the RTTY sub-band, use the Extra class file regardless of whether or not you are in the USA. You’ll see this option come up later.
As you can see, the default RTTY (Digital) sub-bands encompass a large part of the CW sub-band on some bands and part of the SSB sub-band on other bands. So to better filter RTTY spots going to the Packet Spots window, we are going to modify these sub-bands. Let’s start with the 80 meter band showing at 3525 to 3650 khz. RTTY is normally found between 3570 and 3625 khz during contests so it’s suggested the 80 meter RTTY sub-band be changed to 3570 to 3625. Even though Japanese RTTY stations operate down below 3525, it’s suggested to use 3570 khz as the lower end of the RTTY sub-band for 80 meters. If not, it’s likely many CW spots will show up in your Packet Spots window and on the Band Map looking like RTTY stations when they are not.
Select the 80 meter sub-band by clicking on it once. The lower and upper limits of the sub-band will populate the boxes as shown. Change 3525 to 3570, then tab over and change 3650 to 3625, then click the Modify button.
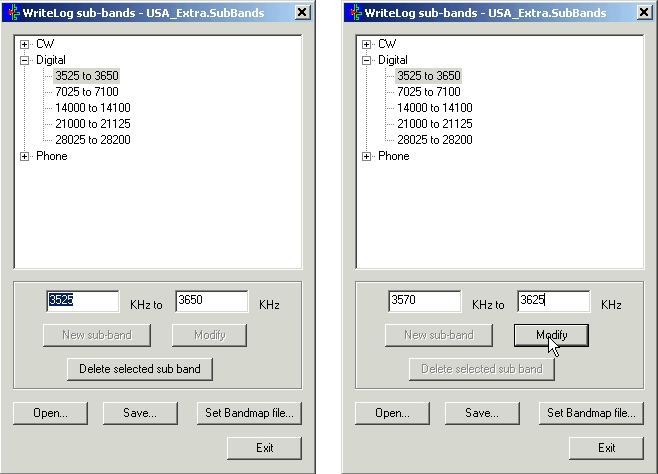
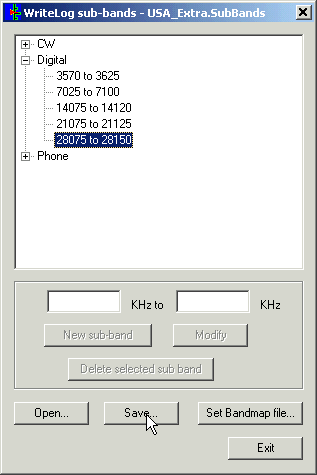
We will modify each of the bands except 40 meters. We will leave 40 meters as is because the whole band from 7025 to 7100 kHz is used during many RTTY contests. Highlight “14000 to 14100” and place it into the upper and lower range boxes, change 14000 to 14075, tab over to 14150 and change it to 14120. Do the same for 15 but changing the lower end of the range to 21075. You can leave the upper limit at 21125 if you wish. Change 10 meters to 28075 to 28150. When you have finished modifying your limits, the screen should look like this.
After you have modified all the frequency ranges the way you want them, click the Save button. Another window will open. Regardless of whether or not you are in the USA, go ahead and highlight Extra and click OK.
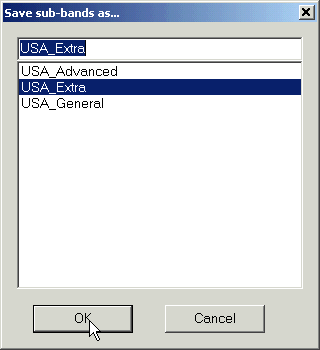
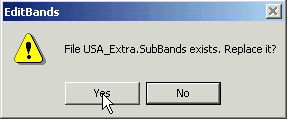
A dialog box will open asking if you want to replace the existing file. Choose Yes.
Back to the edit sub-bands window, you will now want to set the file that will be used for the Bandmap. Click on the “Set Bandmap file”. If another window opens asking you to select which file to use for the Bandmap, choose Extra. This completes editing of the RTTY sub-bands.
Now, packet spots within the ranges you have set will show up colored green in the Packet Spots window the next time you start WriteLog, connect to a Packetcluster etc. All other spots will show in red. Also, only spots in the frequency ranges you set will be shown when you activate the “In-band Only” option. So it’s suggested that you use the “In-band Only” option if you do not use DXTelnet.
As mentioned previously, spots on 40 meters will always be a problem because CW, SSB and RTTY are all operated in the 7025-7100 kHz range. And it’s possible a RTTY station could operate outside the range you have set, but it’s rare. By reducing the sub-band, getting rid of unwanted spots far outweighs any spot you might miss because it falls outside the range you’ve set. Just don’t set your range too narrow. The suggested ranges should work fine in nearly all RTTY contests.
With the Band Map and Packet Spots window activated, you can now double click on a callsign in either window and your radio’s VFO will instantly go to the spotted frequency. It’s a great feature.