
N1MM Logger+ Digital Interface for MMTTY
- Download and Install N1MM Logger+
- Set up N1MM Logger+ Configuration
- Set up Digital Interface Window for MMTTY
- Set up 2Tone in a Receive-Only Window
- Set up Gritty in a Receive-Only Window
- Set up RTTY messages page 1 > F1 through F12
1. Go to the Window Menu and select Digital Interface.
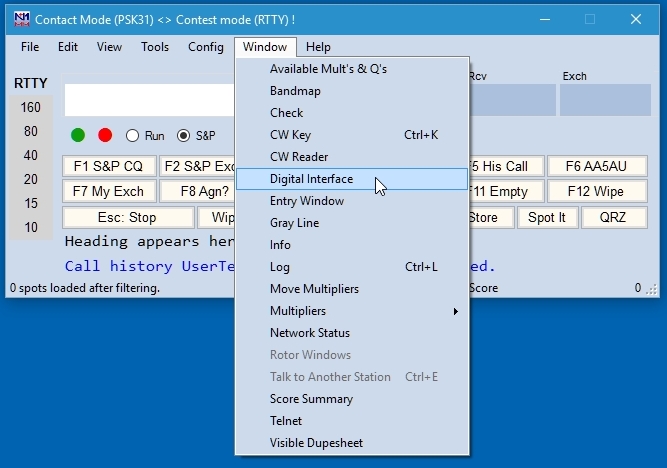
Figure 3-1
2. The Digital Interface will open and it should look like Figure 3-2. Take note that that is Digital Interface 1 (or DI-1) as denoted by the “1” to the right of (MMVARI).
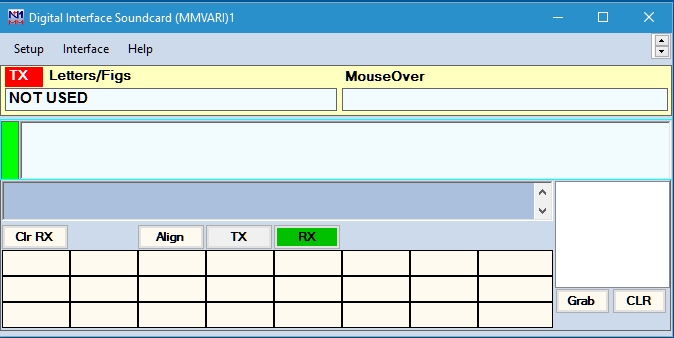
Figure 3-2
3. The Digital Interface (DI) window opens up to MMVARI by default. If the Main Entry Window is on top of the Digital Interface window, move the Main Entry Window away from the Digital Interface window so they don’t overlap each other.
Go to the Interface pull-down menu at the top of the Digital Interface window and select MMTTY as shown in Figure 3-3. The familiar MMTTY control panel, called “RTTY Engine 1”, should appear as shown in Figure 3-5. Drag it away from other windows so they don’t overlap. (If your radio is turned on and MMTTY has already been set up to receive on your sound card, you may see the presence of noise in the display and you may see random noise characters in the Digital Interface window. This is normal.)
Note: With your radio on, tune in a RTTY signal. If you are not printing the signal or see the presence of noise in the RTTY Engine 1 window, then something is not set up correctly. The best way to troubleshoot is to close N1MM and open the standalone MMTTY program. Once you have MMTTY working, then go back to N1MM.
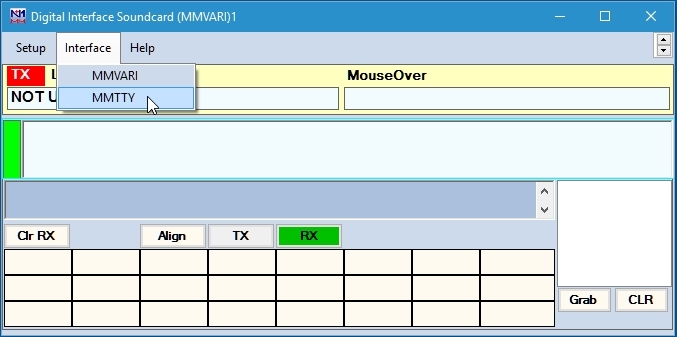
Figure 3-3
After selecting MMTTY in the Interface pull-down menu, the Digital Interface title will change to “DI-1 RTTY Mode – Soundcard (MMTTY)” as shown in Figure 3-4.
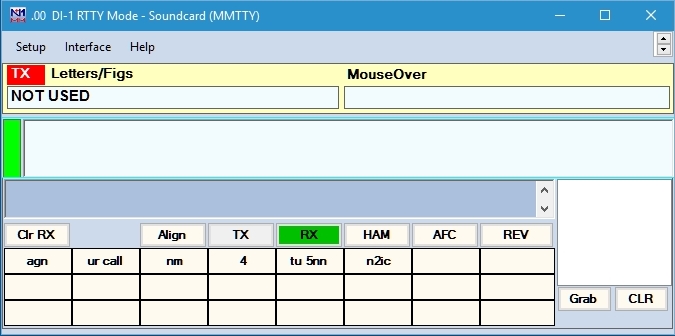
Figure 3-4
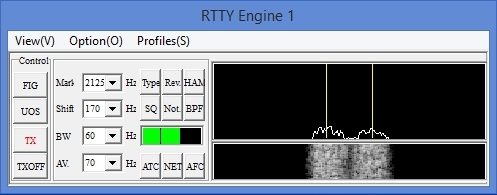
Figure 3-5
4. If you get noise characters to print in the Digital Interface screen, you will notice that the font is quite small. The first order of business is to increase the size of font (if needed). Go back to the main Entry Window, then to Config menu and select Manage Skins, Colors and Fonts.
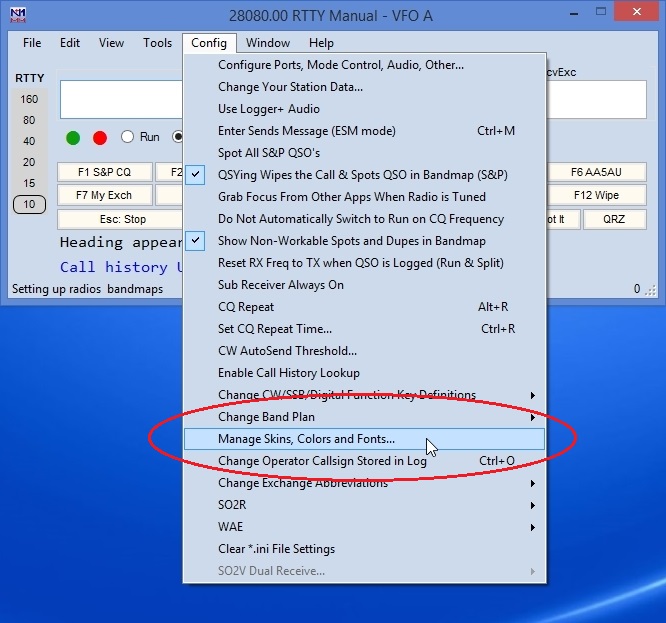
Figure 3-6
5. In the Manage Skins, Colors and Fonts window, select the Fonts tab screen at the top. Then click on the rectangle at the bottom that says Fixed – Digital Interface, Check, Telnet and Score Windows.
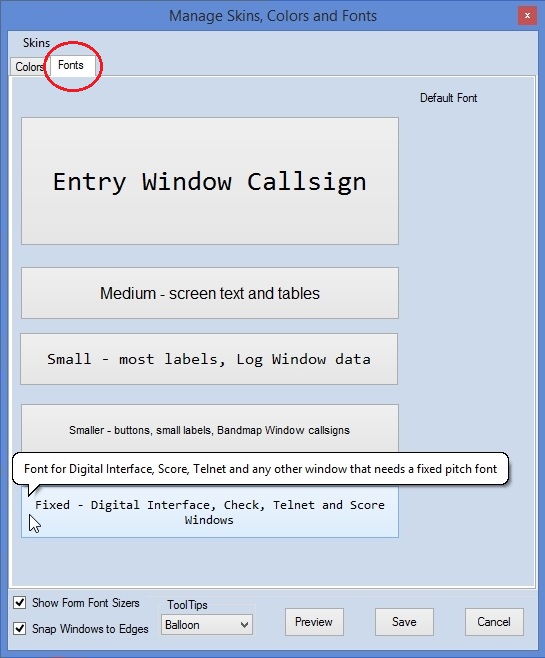
Figure 3-7
6. When the Font window appears, select the Font, Font style and Size you want then click OK. Unfortunately, the maximum size allowed is 14. If you select a size larger than 14, you will receive a message indicating the maximum size is 14. When finished, click OK. Back at the Manage Skins, Colors and Fonts window, click the Save button.
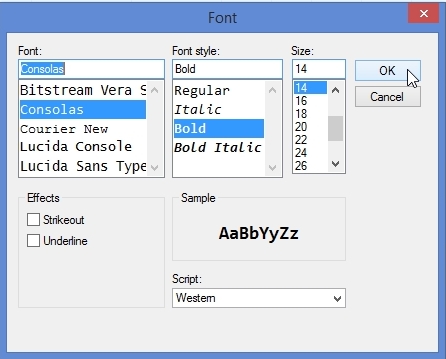
Figure 3-8
Once you have MMTTY set up in DI-1, you are now ready to Set up 2Tone in a Receive-only Digital Interface window.