
N1MM+ Digital Interface for 2Tone
- Download and Install N1MM Logger+
- Set up N1MM Logger+ Configuration
- Set up Digital Interface Window for MMTTY
- Set up 2Tone in a Receive-Only Window
- Set up Gritty in a Receive-Only Window
- Set up RTTY messages page 1 > F1 through F12
N1MM+ > Setting up 2Tone in a Receive-only Digital Interface window
Why use a receive-only Digital Interface window? You use a second RTTY decoder to gain diversity in your receiving of RTTY. What one decoder doesn’t copy, the other might and probably will. Two decoders are better than one, three decoders are better than two, etc. You can use the same sound card for each of your decoders at the same time. N1MM Logger+ allows up to four receive-only RTTY windows. You can click callsigns and reports in any of the RTTY windows to populate fields in the Entry Window.
In order for 2Tone to run in N1MM Logger+, you must have 2Tone.exe and 2Tone.ini somewhere on your computer. The only other requirement is that you have XMMT.ocx registered on your computer as well. XMMT.ocx is the Active X control that allows 2Tone to work. It gets placed on your computer automatically when you update to the latest version on N1MM Logger+ and you never have to worry about it again.
You can download the latest version of 2Tone here on rttycontesting.com (thanks to David, G3YYD, for allowing this) or from the N1MM Logger Digital Yahoo Group website. (AA5AU Note: The latest versions of 2Tone work fine on faster PCs under Windows 7, 8 and 10. However, I have had problems with later versions of 2Tone running on my Windows XP machine which has a slower processor. If you experience problems running 2Tone with N1MM Logger, try an earlier version. All versions are available on the 2Tone Downloads Page here on rttycontesting.com.)
1. Download the latest version of 2Tone if you do not already have 2Tone.exe and 2Tone.ini on your PC. 2Tone.exe and 2Tone.ini are in the zipped file you download. The file will be called 2Tone x.xxx.zip, where x is the version number (such as 2Tone 14.10a.zip). In the zipped file there are also two PDF help files along with the release notes and an mmtty.ini file. Unzip the entire contents of the zipped file into a directory by itself on your hard drive. Because there are different versions of 2Tone, it is suggested you make a directory on your hard drive named 2Tone and that you make individual folders in the 2Tone directory for different versions. You could name the folders v13.09b, v14.10a, v16.02a, etc. for the different versions. This is what it would look like in Windows Explorer (Figure 4-1). NOTE: You only need the latest version. As newer version are released, you create new folders for them.
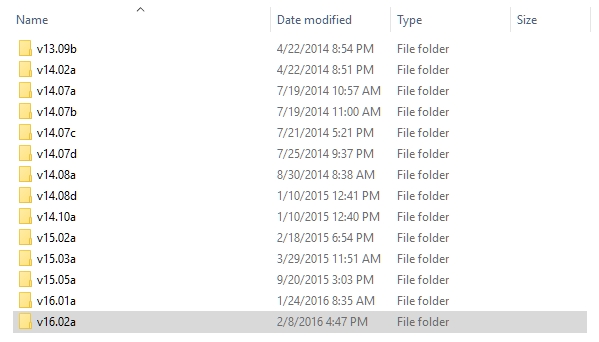
Figure 4-1
2. Open N1MM Logger+ and the Digital Interface window if they are not already opened. Go to the Setup menu, then to Add. RX Windows and select Open Add. RX Window (4 Avail.) as shown in Figure 4-2. (NOTE: Be sure Enable Attached TX Windows in not checked. If it’s checked, un-check it. You can re-enable it after you have added the N1MM receive-only window.)
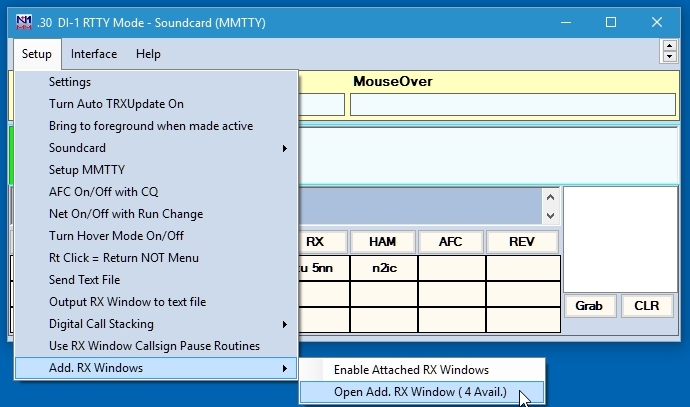
Figure 4-2
3. The DI1 RX Window 1 (Digital Interface 1 Receive Window 1) will open (Figure 4-3). Go to the Window Type pull-down menu and select MMTTY. (Note there is no 2Tone option in the Window Type pull-down menu because 2Tone is a direct replacement for MMTTY).
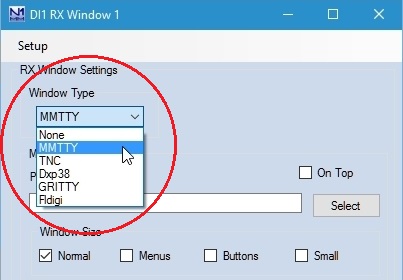
Figure 4-3
4. After selecting MMTTY in the Window Type pull-down menu, click on Select (Figure 4-4) to navigate to the location of 2Tone.exe as shown in Figure 4-5 (Note the path to 2Tone.exe in our example is C:\Ham\2Tone\v16.02a\. Your path may be different depending on where you saved your 2Tone files). Also, do not worry about the other parameters shown below Window Size since they are not used when configuring MMTTY or 2Tone.
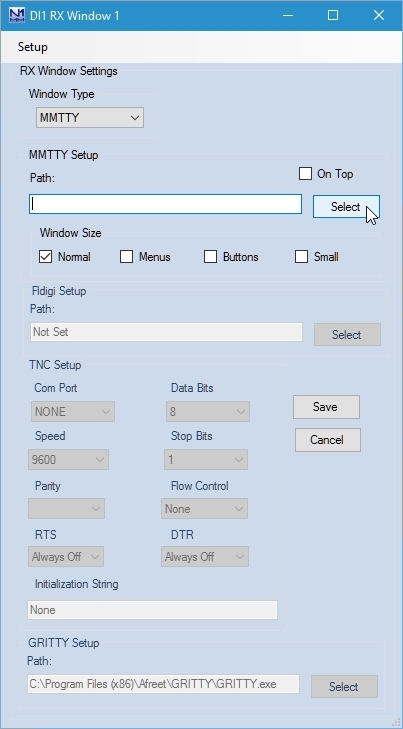
Figure 4-4
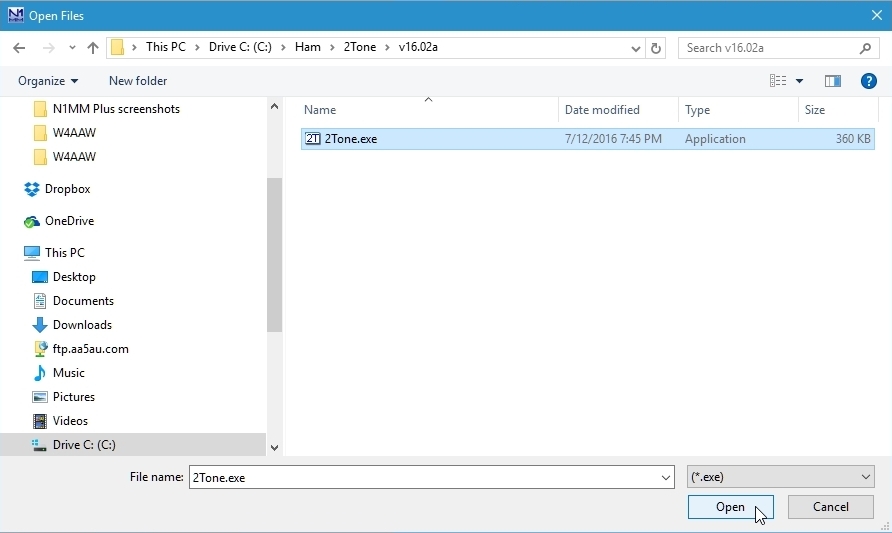
Figure 4-5
5. After you have selected the location of 2Tone.exe, click the Save button.

Figure 4-6
6. After saving the setup information, a 2Tone receive-only DI window opens (DI1 TX Window 1) as well as a 2Tone tuning indicator window (DI RX1 2Tone). You will need to resize the DI1 RX Window 1 and move both windows to where you want them on the screen so they are not overlapping other windows. (Note: Whenever you change the configuration of a DI window, you will be prompted that the windows need to close in order for the changes to take effect – Figure 4-8).
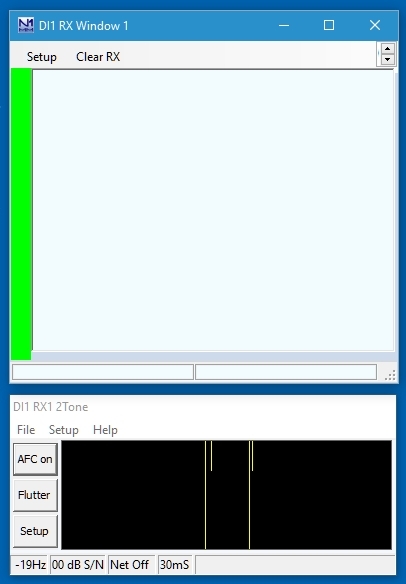
Figure 4-7
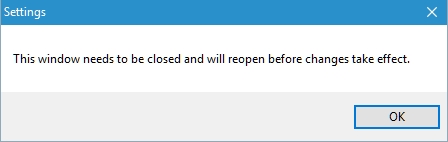
Figure 4-8
7. When the 2Tone windows reopen, click Setup on the 2Tone control panel. The 2Tone Settings window will open as shown in Figure 4-10. Select which Sound Card to use, either Mono, RX Left or RX Right channel on the Sound Card, Mark & Space tone frequencies and the Speed. If you use Low tones, click the Low button. Since 2Tone is being used for receive-only, you do not have to configure the Transmit sound card or TX Operating Mode. However, it is recommended that you leave TX Operating Mode set to AFSK TX. You can also adjust the width of the tuning indicator window (DI1 RX1 2Tone shown in Figure 4-9). There are limitations to this setting so you will need to experiment to see what width works best for you. (HINT: If you are unsure which sound card to use, use the same sound card you have selected in MMTTY Setup on the SoundCard tab screen. To determine which channel to select for the sound card, use the same setting you have in MMTTY Setup on the Misc tab screen. These should work since you already have MMTTY working before you tried setting up N1MM+, right?)
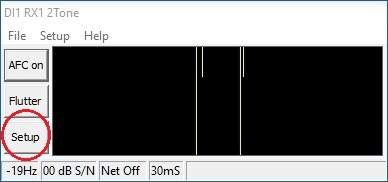
Figure 4-9
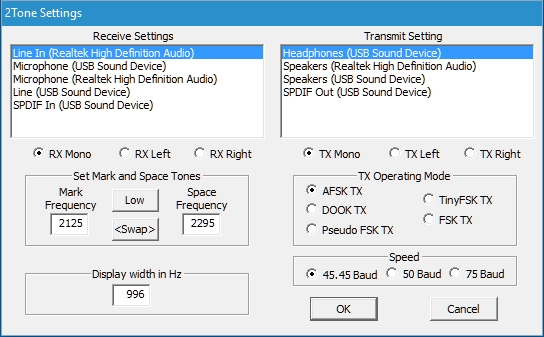
Figure 4-10
8. After you have configured the 2Tone Settings, click OK. Now you have two DI windows capable of receiving RTTY, but the windows are separate. This means that you have to look at two windows. A very nice feature of N1MM Logger+ is that you can attach and unattach receive-only windows to and from the main DI window. To attach your 2Tone DI1 RX Window 1 to the MMTTY DI-1 window, go to the Setting menu > Add. RX Windows > and click on Enable Attached RX Windows as shown in Figure 4-11. Figure 4-12 shows the result of attaching the RX Window. It shows the attached 2Tone window on top and the main MMTTY window on the bottom.

Figure 4-11
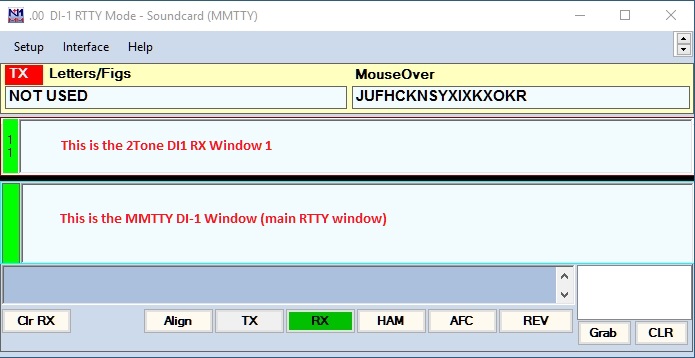
Figure 4-12
Once 2Tone is configured and working, you can then (optionally) add yet another decoder called Gritty to add even more diversity to your receiving of RTTY with N1MM Logger+. Continue to Set up Gritty in a Receive-Only Window or go back to the N1MM Logger+ RTTY Quickstart Guide index page.